Introduction
From my previous endeavors in robotics, I had learned that it’s not easy to get motors to do exactly what you want them to do. So this time, I choose to use pure Lego to make my Lego sorter. Since Lego released their new Mindstorms kit, the previous one (EV3) can be bought second hand fairly cheaply.
The only non Lego parts I use are a Raspberry Pi and the latest HQ camera and some generic LED lights. Some custom designed and 3D printed parts make sure that everything fits nicely together.
On the software side, I use OpenCV, Keras, Tensorflow and the usual Python data wrangling suspects to create a deep learning model to categorize the Lego bricks.
My current setup is only trained to recognize 3 types of bricks, but it does so with very high accuracy (+95%) even though the model is very basic. Obviously, the next step is to extend it and push different types of bricks through the system.
The hardware
Lego EV3 is pure quality. The motors and sensors are very reliable and with some help of the community you can do just about anything with them. If you weren’t convinced that Lego are quality toys, you should get one of these. A lot of little problems that you would run into are fixed by their system. No need for motor drivers, encoders, battery management, etc.
It just works.
What does not “just work” is a solution to put one brick at a time in front of the camera. I got a lot of inspiration from others that have built similar systems, but the end result is most definitely very much mine.
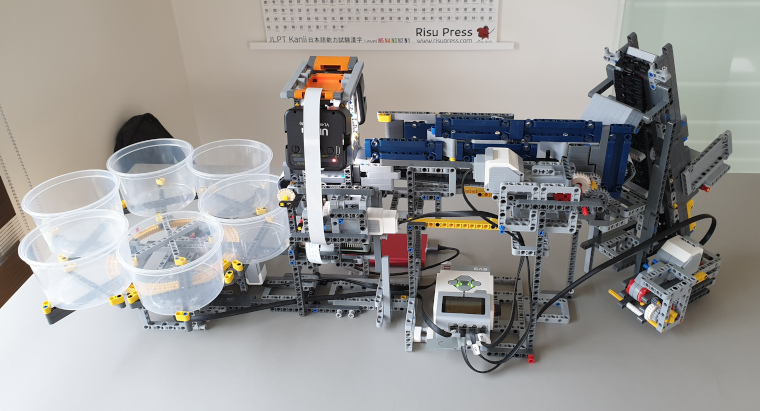
The entire thing is built from one big Technic’s set, the 42055, aka the Bucket Wheel Excavator. It’s a huge set and a very good one if you can still find it at a reasonable price. The B model is also a great built.
The only other Lego items are four EV3 motors (2 large, 2 medium), one light sensor and the big EV3 brick. I also had to buy some additional long EV3 cables, because the machine is fairly big.
Brick size
One important remark: To keep things manageable, I’m only sorting bricks up to about 1 cubic cm. Lego bricks have a huge variety in size which makes this problem even more difficult. So I have 3D printed a sieve that I use to filter out the large bricks and only retain the smaller ones.
The feeder

If you search the Internet for sorters, you’ll find they all use a similar setup: A feeder system arranges the bricks so it can feed one brick at a time to an image recognition system. Next, there is a system that deposits the brick into the correct bin.
The feeder is the most difficult part. I’m still tweaking it constantly. I’ve rebuilt most parts a few times. I will probably rebuild them a few more times.
Even though it’s now pretty reliable, it still manages to push two blocks at a time in front of the camera or a brick does get stuck from time to time.
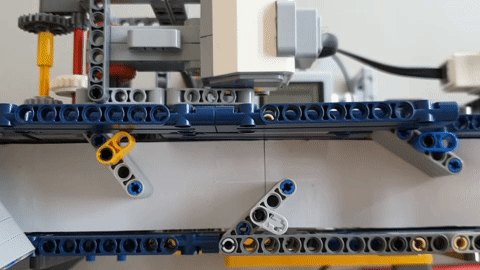
The system consists of two belts. One that takes the bricks up from the initial bin and the second one that has well-placed panels to make sure the bricks exit the feeder one at a time. The idea is that every successive belt is faster than the previous one so the bricks will get separated at they go through the system. I have considered adding a third belt, but that would drastically increase the size of the machine. I may try it in a future iteration by building belts on top of each other.
All belts, except the first one are wrapped in a thin layer of paper. The Lego bricks slide over the paper, which is an essential part of the feeder system. The panels make the bricks slide into one line of individual pieces.
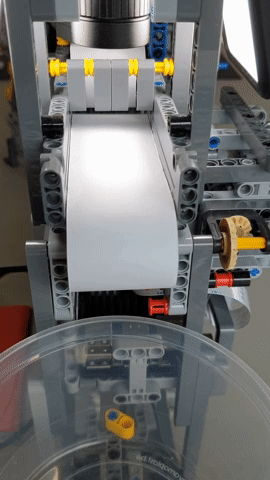
The recognition
The Raspberry Pi and its high quality camera continuously monitor the belt underneath. If it detects motion, it stops the feeder and will try to position the brick in the middle of the image. I have added two LED flashlights that make sure the brick is evenly lit, even when the sun does not want to cooperate.
When the brick is positioned underneath the camera, it snaps a picture and sends this to the recognition neural network.
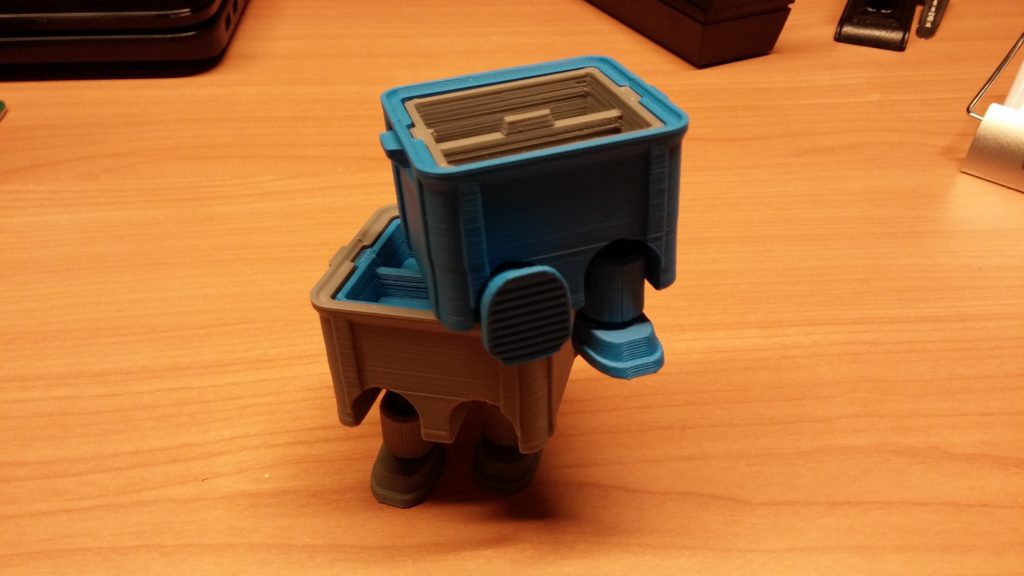
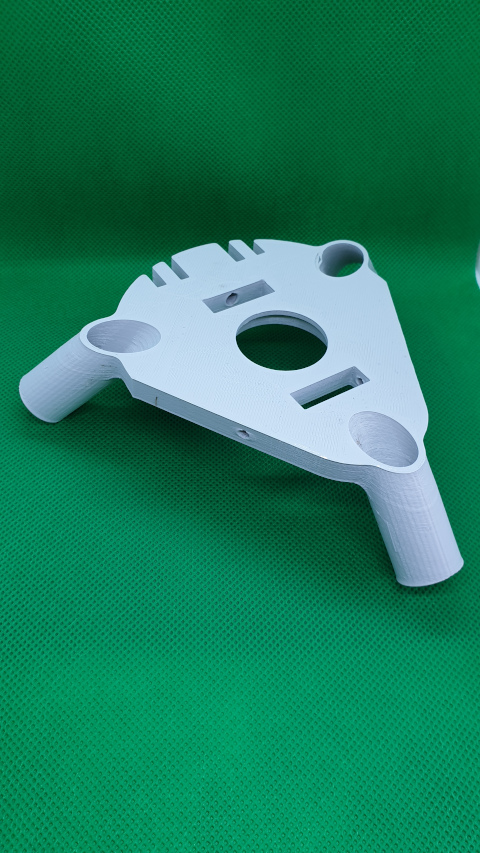
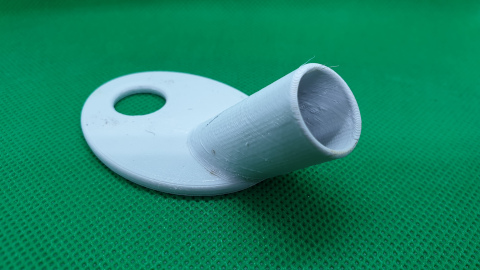
I designed and printed some parts so that I could mount the camera and flashlights to the Technic parts. The parts are available on Thingiverse should you want to try to reproduce my results.
Actual sorting
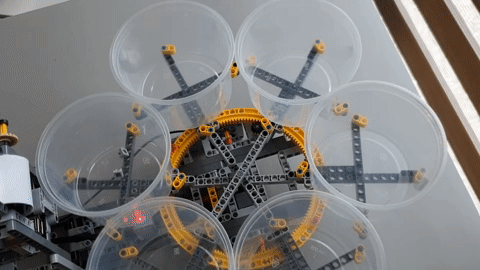
Once the brick type is known, the hard work is done. The final stage of the sorting machine consists of six buckets.
The buckets are mounted to a spinning wheel. Underneath the wheel is a Mindstorms color sensor. This sensor senses when a bucket is above it and will make sure the bucket is properly aligned.
The software
All software and links to inspiration can be found on GitHub. I’ve gotten a lot of good ideas from Kaggle. Things that were not clear, I could find in the great documentation for Keras and Tensorflow.
Most of the software runs inside Jupyter notebook. Notebooks are annoying to version control, but it’s absolutely the ideal way to quickly experiment and try out new ideas.
Motion detection
Motion detection is using OpenCV. It took some experimentation to get it to work inside a Jupyter notebook, but eventually it worked. It is now fairly reliable at detecting movement, even if it’s a white Lego brick on the white belt.
Deep learning
My deep learning model is based on VGG16 with some extra layers for transfer learning. I’ve also experimented with fine-tuning, but for my limited dataset, it has not (yet) been very useful. I expect that will change when more photos are added.
The labeled data is also part of the Github project. I currently do the labeling by hand, by dragging the images into the proper folder. I’m also keeping some reference images of the belt without a brick. I’m not using these right now, but they may come in handy if I want to do more pre-processing in the future.
The deep learning part of the software runs on my desktop PC and the Raspberry Pi accesses it via a basic Rest API (built using Flask). I could probably run the inference on the Pi, but for now, I have kept the training and inference on the same machine.
Conclusion
While there’s still a lot to be improved. I’m very happy with how far I got. It demonstrates how far technology has come. We live in a great time when a single guy can build this kind of machines at home. And it was great fun!
]]>


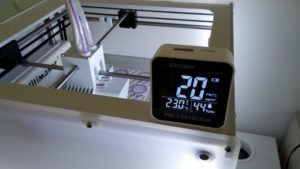
 <figcaption class="wp-caption-text">My setup: output is directly displayed on the screen. I’m working on an extension to log the measurements and run experiments over longer time windows.</figcaption></figure>
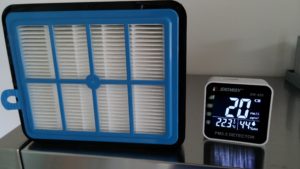
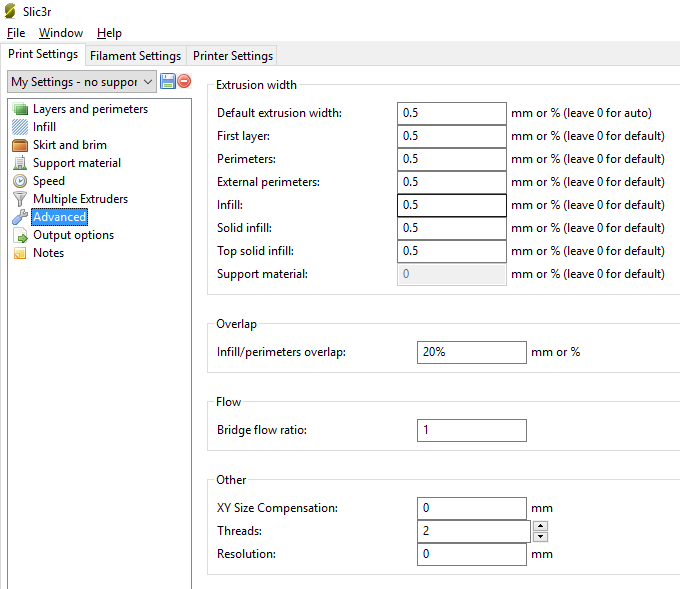 <figcaption class="wp-caption-text">I decided to go for 0.5mm extrusion width for everything. Some articles suggest decreasing the perimeter width, but going below 0.5mm only made things worse on my printer.</figcaption></figure>
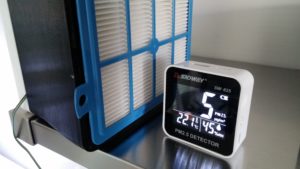
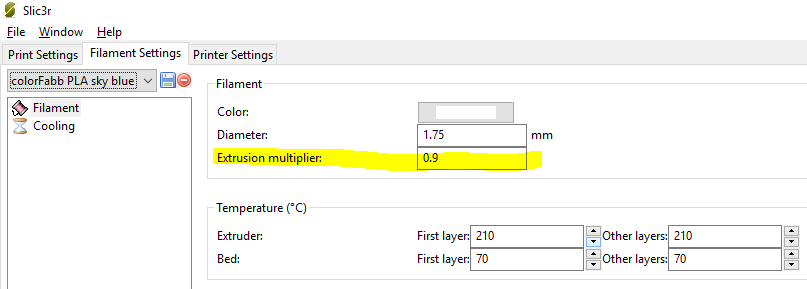 <figcaption class="wp-caption-text">The ColorFabb filament uses an extrusion multiplier of 0.9 which is at the low end. This is because I did most the tuning with a cheap filament that was not 1.75mm but a bit less. I probably should redo my E-steps tuning.</figcaption></figure>