Since my last post, quite some time ago, I have been studying up on designing objects for 3D printing. I created some custom hooks that made my wife happy. I fixed my son’s broken toys. And most recently, I adapted an existing water rocket design to fit the parts I had lying around. Great fun ensued.
Designing for 3D Printing
When I first got my 3D printer, I went through a phase of printing all kinds of random stuff from Thingiverse. For a short while, I even ran a small business selling 3D printed trinkets. I guess it’s a rite of passage for any one with a 3D printer.
However, I grew pretty tired of that fairly fast. When I started designing my own objects things really got interesting.
If you want to get started with designing your own objects for 3D printing, I have two suggestions:
- For mechanical parts, I really love OpenSCAD. There’s a pretty steep learning, but it’s worth learning. It will especially appeal to developers.
- For everything else, there’s only one choice and it’s Fusion360. I tried many other tools, but this one is the perfect balance between a good price (free for most, pretty affordable for every one else) and extremely rich functionality. It’s parametric design is OpenSCAD on steroids and the amount of tutorials available on YouTube is staggering.
Water Rockets
A water rocket is, in essence, a plastic bottle under pressure. Water is pushed out to drive the rocket into the air.
Technically, it’s a really simple system, however, the devil is in the details. If you search the Internet and Thingiverse, you’ll find a lot of designs. Some of which look downright dangerous (you are playing with a pressurized vessel, so some caution is needed) and others simply don’t hold up to the forces.
After some searching around, I decided to go for the Raketfued design. It’s simple, it’s modular, it looks capable from their videos and it uses many existing components that you can buy of the shelve.
The Parts
Water rockets are fairly easy, generally speaking, you need:
- An actual rocket that will contain water and pressurized air.
- Some way to put air pressure in the rocket.
- A launchpad to hold the rocket in place before it is launched.
The Rocket
The rocket is easy enough. Just find an empty soda bottle. However, a good nozzle is more complicated than you may think. It’s the part that you use to put pressure into the bottle and through that same part water will exit at great force to push the rocket forward.
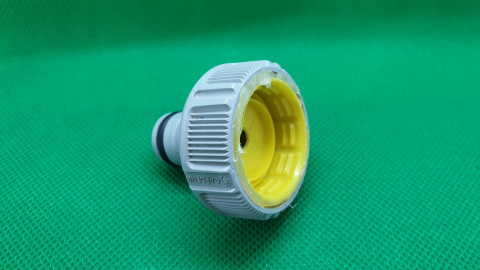
Initially, I tried to print the nozzle on the Raketfued website. After some initial disappointment, I would advice every one to just buy a Gardena tap connector (the large version) and glue in a soda bottle cap.
It just works and with the right glue, it’s much more reliable than anything you may be able to print. I used a 2 component glue that nicely filled all the cracks and crevices and is super strong.
You can also add a nosecone and wings to your rocket. Don’t make it too fancy at first. I forgot to take pictures before we started launching and there’s not much left to take pictures of.
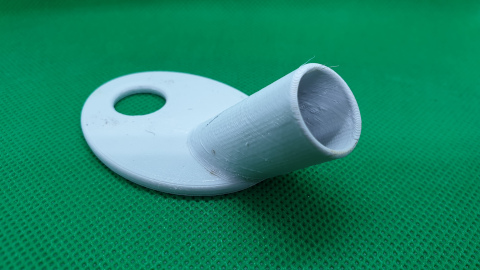
Pressure Hose
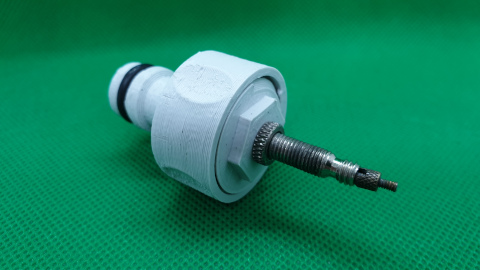
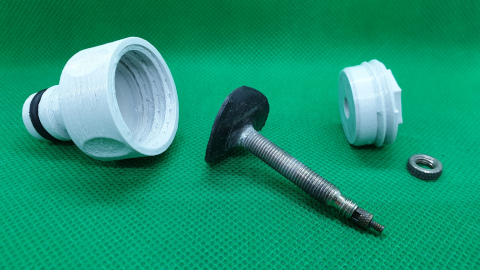
Next, you will need to pressurize the rocket. The brilliance of the Raketfued system is that is uses standard Gardena hoses and connectors. You may have most of what you need already lying around in your garden shed.
Raketfued uses a car tire valve which I don’t have, but I did have a bike valve and bicycle tire pump. So I designed a small screw-in connector piece to use that one. I needed a few tries, but the result works perfectly. Both parts are printed. First the the Raketfued Gardena to screwcap connector and second my own screw-in plug.
The Launchpad
The final part is something to hold your rocket in place until the launch.
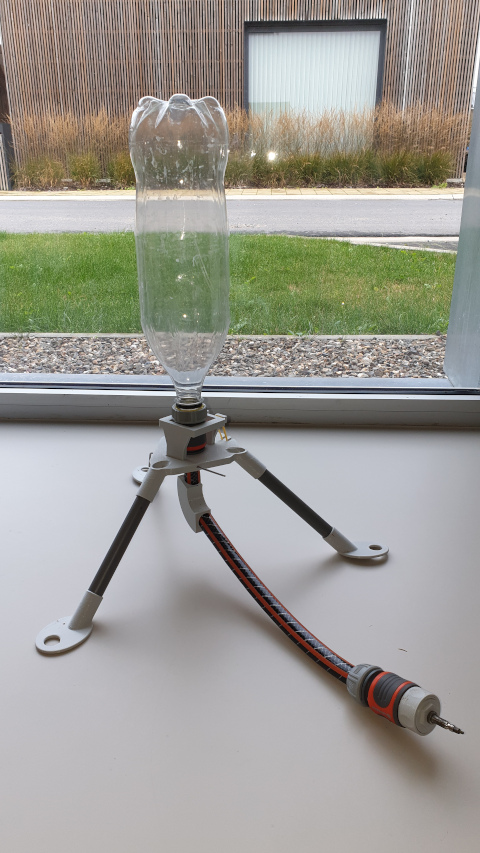
I took the PodPad and adapted it to what I had in my garage:
- Smaller holes to fit a 16mm PVC pipe for the frame.
- Larger holes in the feet because I didn’t have tent pegs, but I do have larger pegs to hold the net in place that protects our raspberries from hungry birds.
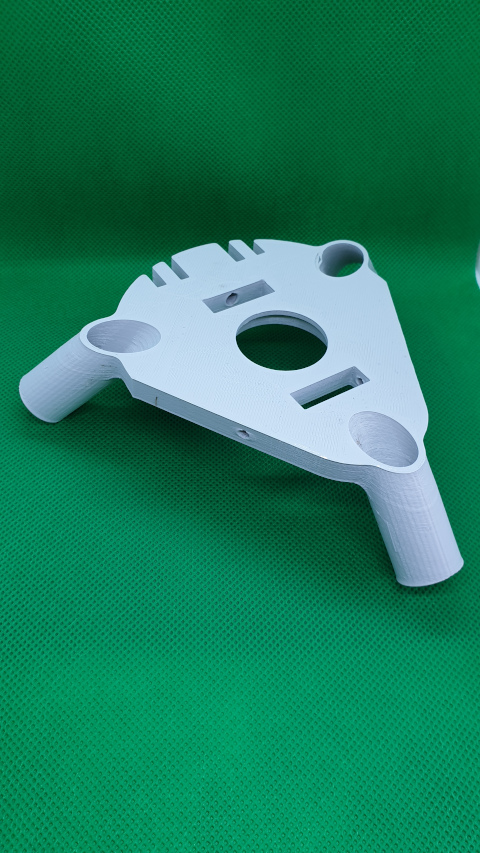
All modified parts are available on Thingiverse.
I did not change anything about the actual mechanic. This launchpad works flawlessly and it shows that simple designs are usually the best.
Conclusion
When everything was designed and printed, it was time to head outside. It took some trial and error to get the amount of water and pressure right, but we had a number of good flights before the rocket started to disintegrate.
We lost the wings first, which severely impacted the flight path. Things got much more exciting and we had to duck a few times (keep your distance!)
Overall it was an incredible amount of fun and a great family activity.
Give it a try next summer.
You can find everything you need on Raketfuedrockets.com and my parts on Thingiverse.