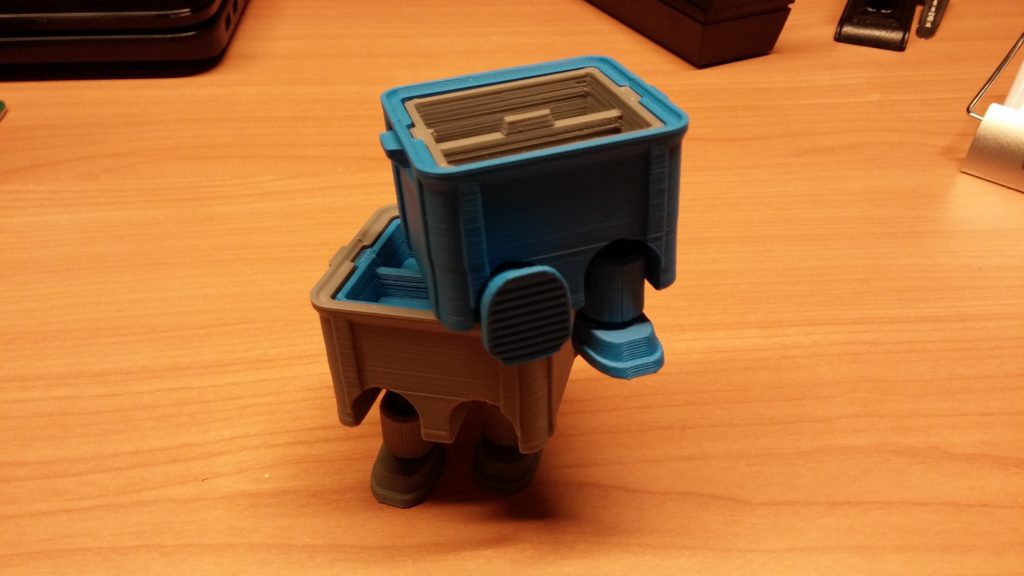
One of the great things about 3D printing is that you can print an entire model in one go. The typical example is the fully assembled “print-in-place” ball bearing as shown in the image above. This is printed in one go, no assembly required. However, the tolerances are pretty small which requires a well-tuned 3D printer. In this article, I describe how I tune my machine for perfect fit.
Because layers of a 3D printed object are never perfectly aligned, you need a bit of a margin between parts that should touch. If you don’t, the two parts will fuse together.
There are test objects that you can print to help you figure out what margins you need. I printed this test and it turns out, the parts didn’t even fit at the largest margin.
Clearly something was wrong with my settings.
And thus began a frustrating experience of figuring out how to exactly align all the different factors that influence a perfectly printed part.
The three factors you need to take into account are:
- E-steps, or how fast your extruder will push filament through the nozzle.
- The extrusion size, which is the layer height and extrusion width of the extruded filament.
- The extrusion multiplier, which allows you to tweak the amount of filament extruder per type of filament.
Calibrate E-steps
This is the most important thing to you can do to improve your prints. You need to tune the extruder steps setting to perfection. I’ve already mentioned those in my previous article, but I’m going to repeat those two videos, these are exactly what you need:
[embedyt]https://www.youtube.com/watch?v=w_Wb0i0-Qvo[/embedyt]
[embedyt]https://www.youtube.com/watch?v=cnjE5udkNEA[/embedyt]
Extrusion Width and Layer Height
In your slicer, you can configure the extrusion width and layer height.
Your layer height should stay well below your nozzle diameter. If you have a 0.4mm nozzle, a layer height of 0.2mm is fine. 0.1mm will work too, but your prints will take double the time.
Most slicers, such as Slic3r will, by default, automatically calculate an extrusion width value that they consider “good” for your nozzle diameter.
In general you want the extrusion width to be wider than the diameter of your nozzle. So if you have a 0.4mm diameter nozzle, go for 0.5mm width. If you go below that, chances are there will be some overextrusion which will almost certainly make parts not fit (most importantly, you’ll get too small holes in your prints)
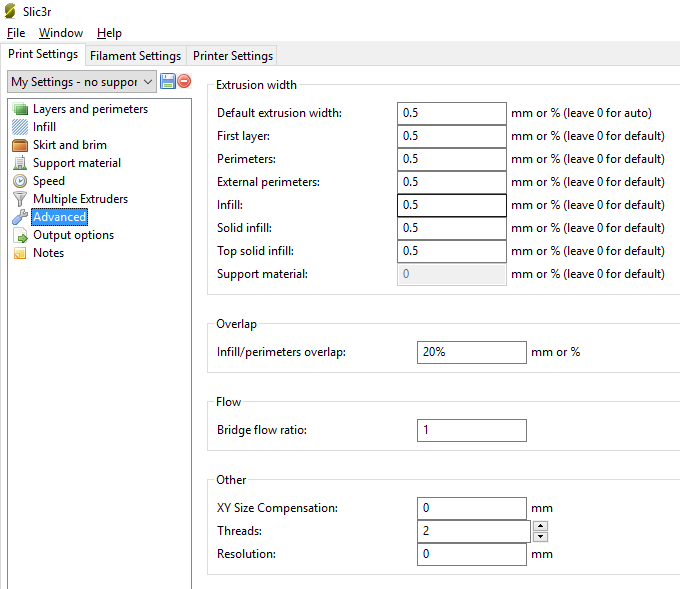 <figcaption class="wp-caption-text">I decided to go for 0.5mm extrusion width for everything. Some articles suggest decreasing the perimeter width, but going below 0.5mm only made things worse on my printer.</figcaption></figure>
Many tutorials on fit calibration will tell you to decrease the extrusion width of the perimeters. This is good advice, as long as you don’t go below your nozzle’s diameter.
Extrusion Multiplier
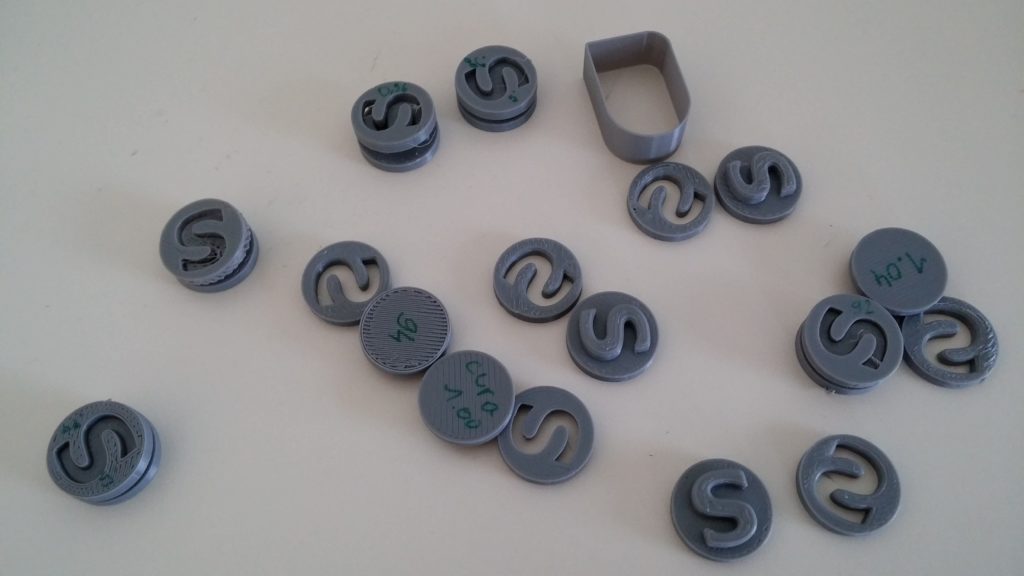
With all of that out of the way, it’s time to start printing calibration pieces and fine tune the extrusion multiplier until the result is what you want.
I like this S-plug design because it is a quick print, unlike some other calibration objects.
Start by printing it with your current settings and check that:
- The bottom and top layers are filled, but are not bulging.
- The pieces fit. You should need a bit of force to push them together.
- Layers are not separated
Probably your first test is not going to be right. This is where tuning the extrusion multiplier comes into play.
Go to the filament settings in your slicer program and change the extrusion multiplier: increase it if you the fit is too loose or decrease it if you were not able to push the parts together.
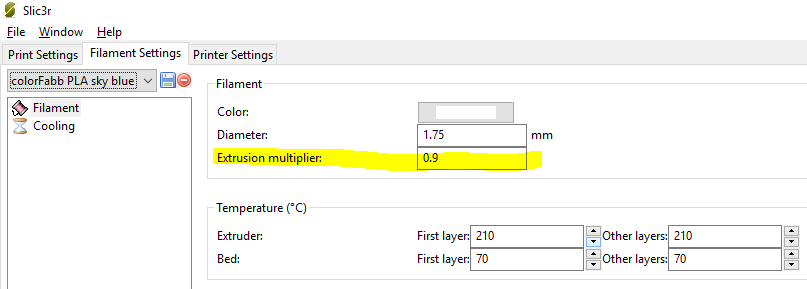 <figcaption class="wp-caption-text">The ColorFabb filament uses an extrusion multiplier of 0.9 which is at the low end. This is because I did most the tuning with a cheap filament that was not 1.75mm but a bit less. I probably should redo my E-steps tuning.</figcaption></figure>
Result
You are now able to print all of those cool objects with joints and bearings that always used to fuse together. Awesome!
From now on, every time you want to start using a new roll of filament, you print a few S plugs and adjust the extrusion multiplier for that filament. That will ensure perfect fit.
This is a cool test object if you’re looking for something to try.