Over the Christmas break I built a RepRap 3D printer. Everything went well until it was finished. The information on getting started with actual printing is very fragmented and all over the place. So here’s a short guide for any budding RepRappers who can’t wait to get started.
For a few years now, I’ve always wanted to build my own 3D printer. At the end of last year, I felt the time was right. Because it’s open source, a RepRap was my first choice.
As a first 3D printer build, I would suggest any one to go for a cheap kit. I like Sunhokey on AliExpress. Their support is great!
The documentation that comes with the printer is fine and you’ll be able to build the machine in 1 or 2 days.
Calibration
However, the documentation ends when you turn on the printer. There is a bit of information, but it’s limited. That’s a pity, because it’s only then that the real work starts.
I’m sure you will want to print something ASAP and do all the tweaking later on. However, take 10 minutes and calibrate the following two things first:
- Leveling the bed and configuring the 0 position of the Z axis.
- Tweaking the “esteps” setting.
Take some time to get this right and you’ll be on your way for a quick and successful first print.
Leveling the bed
Leveling the printer bed properly is the most important thing you need to do. The following video gives a good advise for how to do this. The Sunhokey RepRap Prusa i3 has tumb screws on the bed itself so it was a lot easier than what is shown, but the core idea doesn’t change.
[embedyt] http://www.youtube.com/watch?v=t5N-ouqU9sM[/embedyt]
Configuring the esteps
Setting the right value for “esteps” is important to properly fill the objects and make them sturdy. Start with the first video and try the second if you feel like it could help.
[embedyt]https://www.youtube.com/watch?v=w_Wb0i0-Qvo[/embedyt]
[embedyt]https://www.youtube.com/watch?v=cnjE5udkNEA[/embedyt]
First Prints
That was the boring part. Now it’s time to print something!
For your first prints, choose models that are not too complex and that have a good base. Also try to avoid large overhangs and bridges (parts floating in between others). Here are 5 good models to get started:
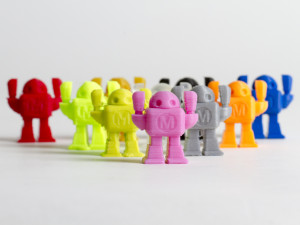
MAKE’s robot is a great small piece to get started. Start with the version with arms up. It’s small, so if something goes wrong, you’ll see it right away. It has a good wide base, so it should stick to the print bed well.
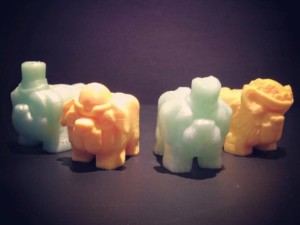
These are four more good models. They are fun to print in different sizes and colors. There’s a little more detail in them than in the maker robot. Check how well the faces are printed and try to improve.
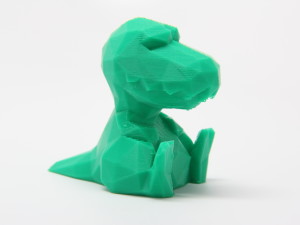
This is a good model to start and experiment with supports. A support is additional material that you print to support printing of, in this case, the chin. The idea is that you can easily remove it when printing is done.
By default, Slic3r will generate too much support structures. I’m still figuring the right settings out myself.
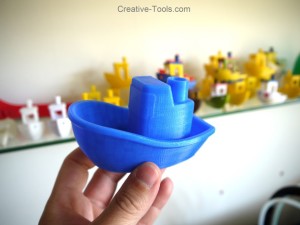
Another awesome model. With this one you can test overhangs (parts that print at an angle). You shouldn’t need any supports at all to print this properly.
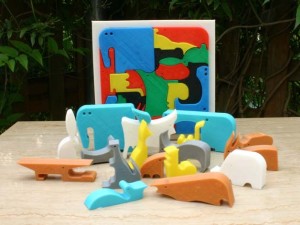
This is a neat puzzle. It’s more difficult than you think.
Although you won’t be able to print it in multiple colors, it’s a very good test for your E-steps settings. If it’s too low, the parts won’t be filled. If it’s too high, the pieces will stick together.
Next steps
When you’ve printed all of these models and some, you will start to get a good feel of what works and what doesn’t. At this point, all of the calibration advise will start to make a lot more sense. So now you could start printing some calibration objects to tweak your settings.