Introduction
DOSBox is one of the greatest open source tools out there. It emulates an x86 computer, including the DOS operating system with all its very peculiar memory management options and various hardware configurations. It transports you back into time. When Personal Computers where not for the faint of heart. Playing the latest games involved messy configuration and hours of experimentation to get games to run correctly on your particular piece of hardware. And then Windows 95 came, and most of those old games just stopped working entirely.
 <figcaption class="wp-caption-text">The price of freedom is eternal vigilance</figcaption></figure>
If you thought that old software was lost to the ages, DOSBox is here to save the day. It emulates all those DOS peculiarities. And it does this surprisingly well. Obviously, you need a computer that’s a hundred times more powerful than the one you originally played the game on. But don’t worry, most computers these days will suffice for even the most advanced 3D game of those heydays.
The trouble though, for those who have never had the joy of working in DOS or who have never seen a command line, is that a prompt can be a great source of mystery. There are a bunch of frontends available that make it easier to work with DOSBox. But if you’re interested in old technology, it’s really worth it to learn the basics of DOS.
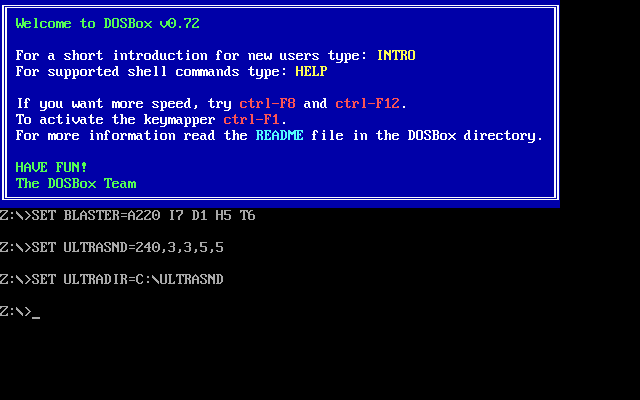
To get you started this is what the prompt looks like (you might need to click on the image to get a clear view):

But lets not get ahead of ourselves. Here’s the entire tutorial of how to get that game you’ve always wanted to play, working on your machine. This tutorial is Windows centric, but DosBox runs on pretty much any operating system, so it should be useful for every one.
Get and install DOSBox
This is the easy party, go to the DOSBox download site and pick your flavor. Once the file is downloaded, install the program. In the case of Windows, you’ll have yourself an executable that can be double clicked to get the installation started.
Easy as pie.

Basic setup (don’t worry it’s not rocket science)
To focus the thoughts, I’ll be showing how to get Wing Commander IV (WC4 from now on) running. The process will be the same for any game that comes on a CD.
First, you’ll want to write down the following information:
- Put the game disc in a CD drive and make a note of the drive letter. If the game is somewhere on your harddrive, make a note of the entire directory name (so, starting with the drive letter, and all the way up)
- Not strictly necessary, but if you like to keep your files tidy, it’s a good idea to create a directory which will be your virtual hard drive within DOSBox. This drive will hold all game related files such as savegames and configuration. You can just mount your entire drive, but it’s lot neater if you create a directory. Write down the name and location of that directory too.
As for my example, theWC4 game is on a CD in drive I, DosBox is installed on drive H and I’ve created a directory inside the DosBox installation:
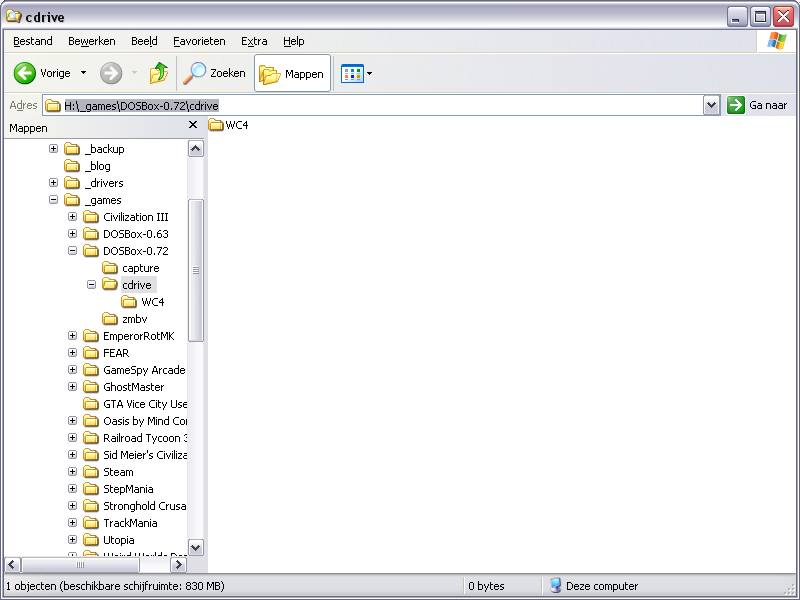
(note that there is already a directory “WC4” created on a previous run of the application, you don’t need to create that one)
Start DOSBox
If the installation did go right, this will be the easiest step. Find DosBox in the menu and execute it. You should see the startup screen:
Possibly, a second screen will have opened, depending on the startup option you choose (noconsole version or not). At any time, you can switch between full-screen and windowed mode by pressing alt-enter. Keep the screen windowed for now, but once a game is running, you probably want to switch.
Mount the drives
DOSBox creates a virtual file system. A file system, like the thing you see in explorer, but one that only exists within the DOSBox program. By default, there is only a Z drive present, which is used for booting DOSBox and which has some tools present. Don’t worry about those for now.
The first thing we need to do now, is let DOSBox know which drives and directories we want to use. Let’s create 2 virtual drives. One C drive, which points to the empty directory we created in the previous step. And a D drive, which points to the CD drive where the game is.
Type in the following to mount the C drive:
mount C <your C directory>
Replace
mount C H:\_games\DOSBox-0.72\cdrive
You should receive a message that the directory was mounted. One important note: if you have a directory that contains a space, you have to put quotes around it. Eg:
mount C "C:\My documents\My C drive"
In general, DOS cannot deal with spaces in directory names very well. So try to avoid them completely inside DOSBox.
Next it’s time to mount the CD drive. To make sure DOSBox know this is a CD-ROM drive, you need to add an extra parameter:
mount D D:\ -t cdrom
In case the game is on your hard drive, you can skip the parameter:
mount D E:\mygame
This will probably be enough for most games, but if it’s not, try the “intro” command. Also take a look at the dosbox website if the game is supported and if you need special options. And you can always ask me, I like a challenge.
Start the game
This is the trickiest part, because every game is different. In case of Wing Commander IV, I just had to switch to the D drive by typing:
D:
And start the game. For WC4 you just type:
WC4
If you don’t know the exact command, try to look in the manual, or execute “dir”. This will produce a list of files on the disc. All file names will be maximum 8 characters, a dot and another 3 characters. The ones that end in “.exe”, “.com” or “.bat” can be executed by typing the name of that file. Try a few of those and see what happens. Usually there’s an INSTALL or SETUP one that will configure the game and there’s one that resembles the name of the game to start it.
Enjoy the game!
Screencast
