In a little detour from my usual posts, I present you a small tutorial on fixing a broken CD player. Actually, the post only goes into cleaning the player’s lens, which is the number one most common reason why a CD player will mallfunction. It’s a very basic repair, so don’t expect any complicated electro howto. It is however not something most people will easily do, because in most cases you’ll have to void your warranty. So only try this if your only other option is going to a repair guy.
I dabble a bit in hardware do-it-yourself from time to time, especially if it involves old-ish quality equipment that I really don’t want to replace. Many devices are created to only last a few years, which is really too bad. They usually fail in pretty straightforward ways (broken joystick on phones, lenses or driver belts on many CD/DVD players) but are very expensive to get repaired. Probably because the companies prefer that you just buy a new one. We can’t let them get away with that, now can we.
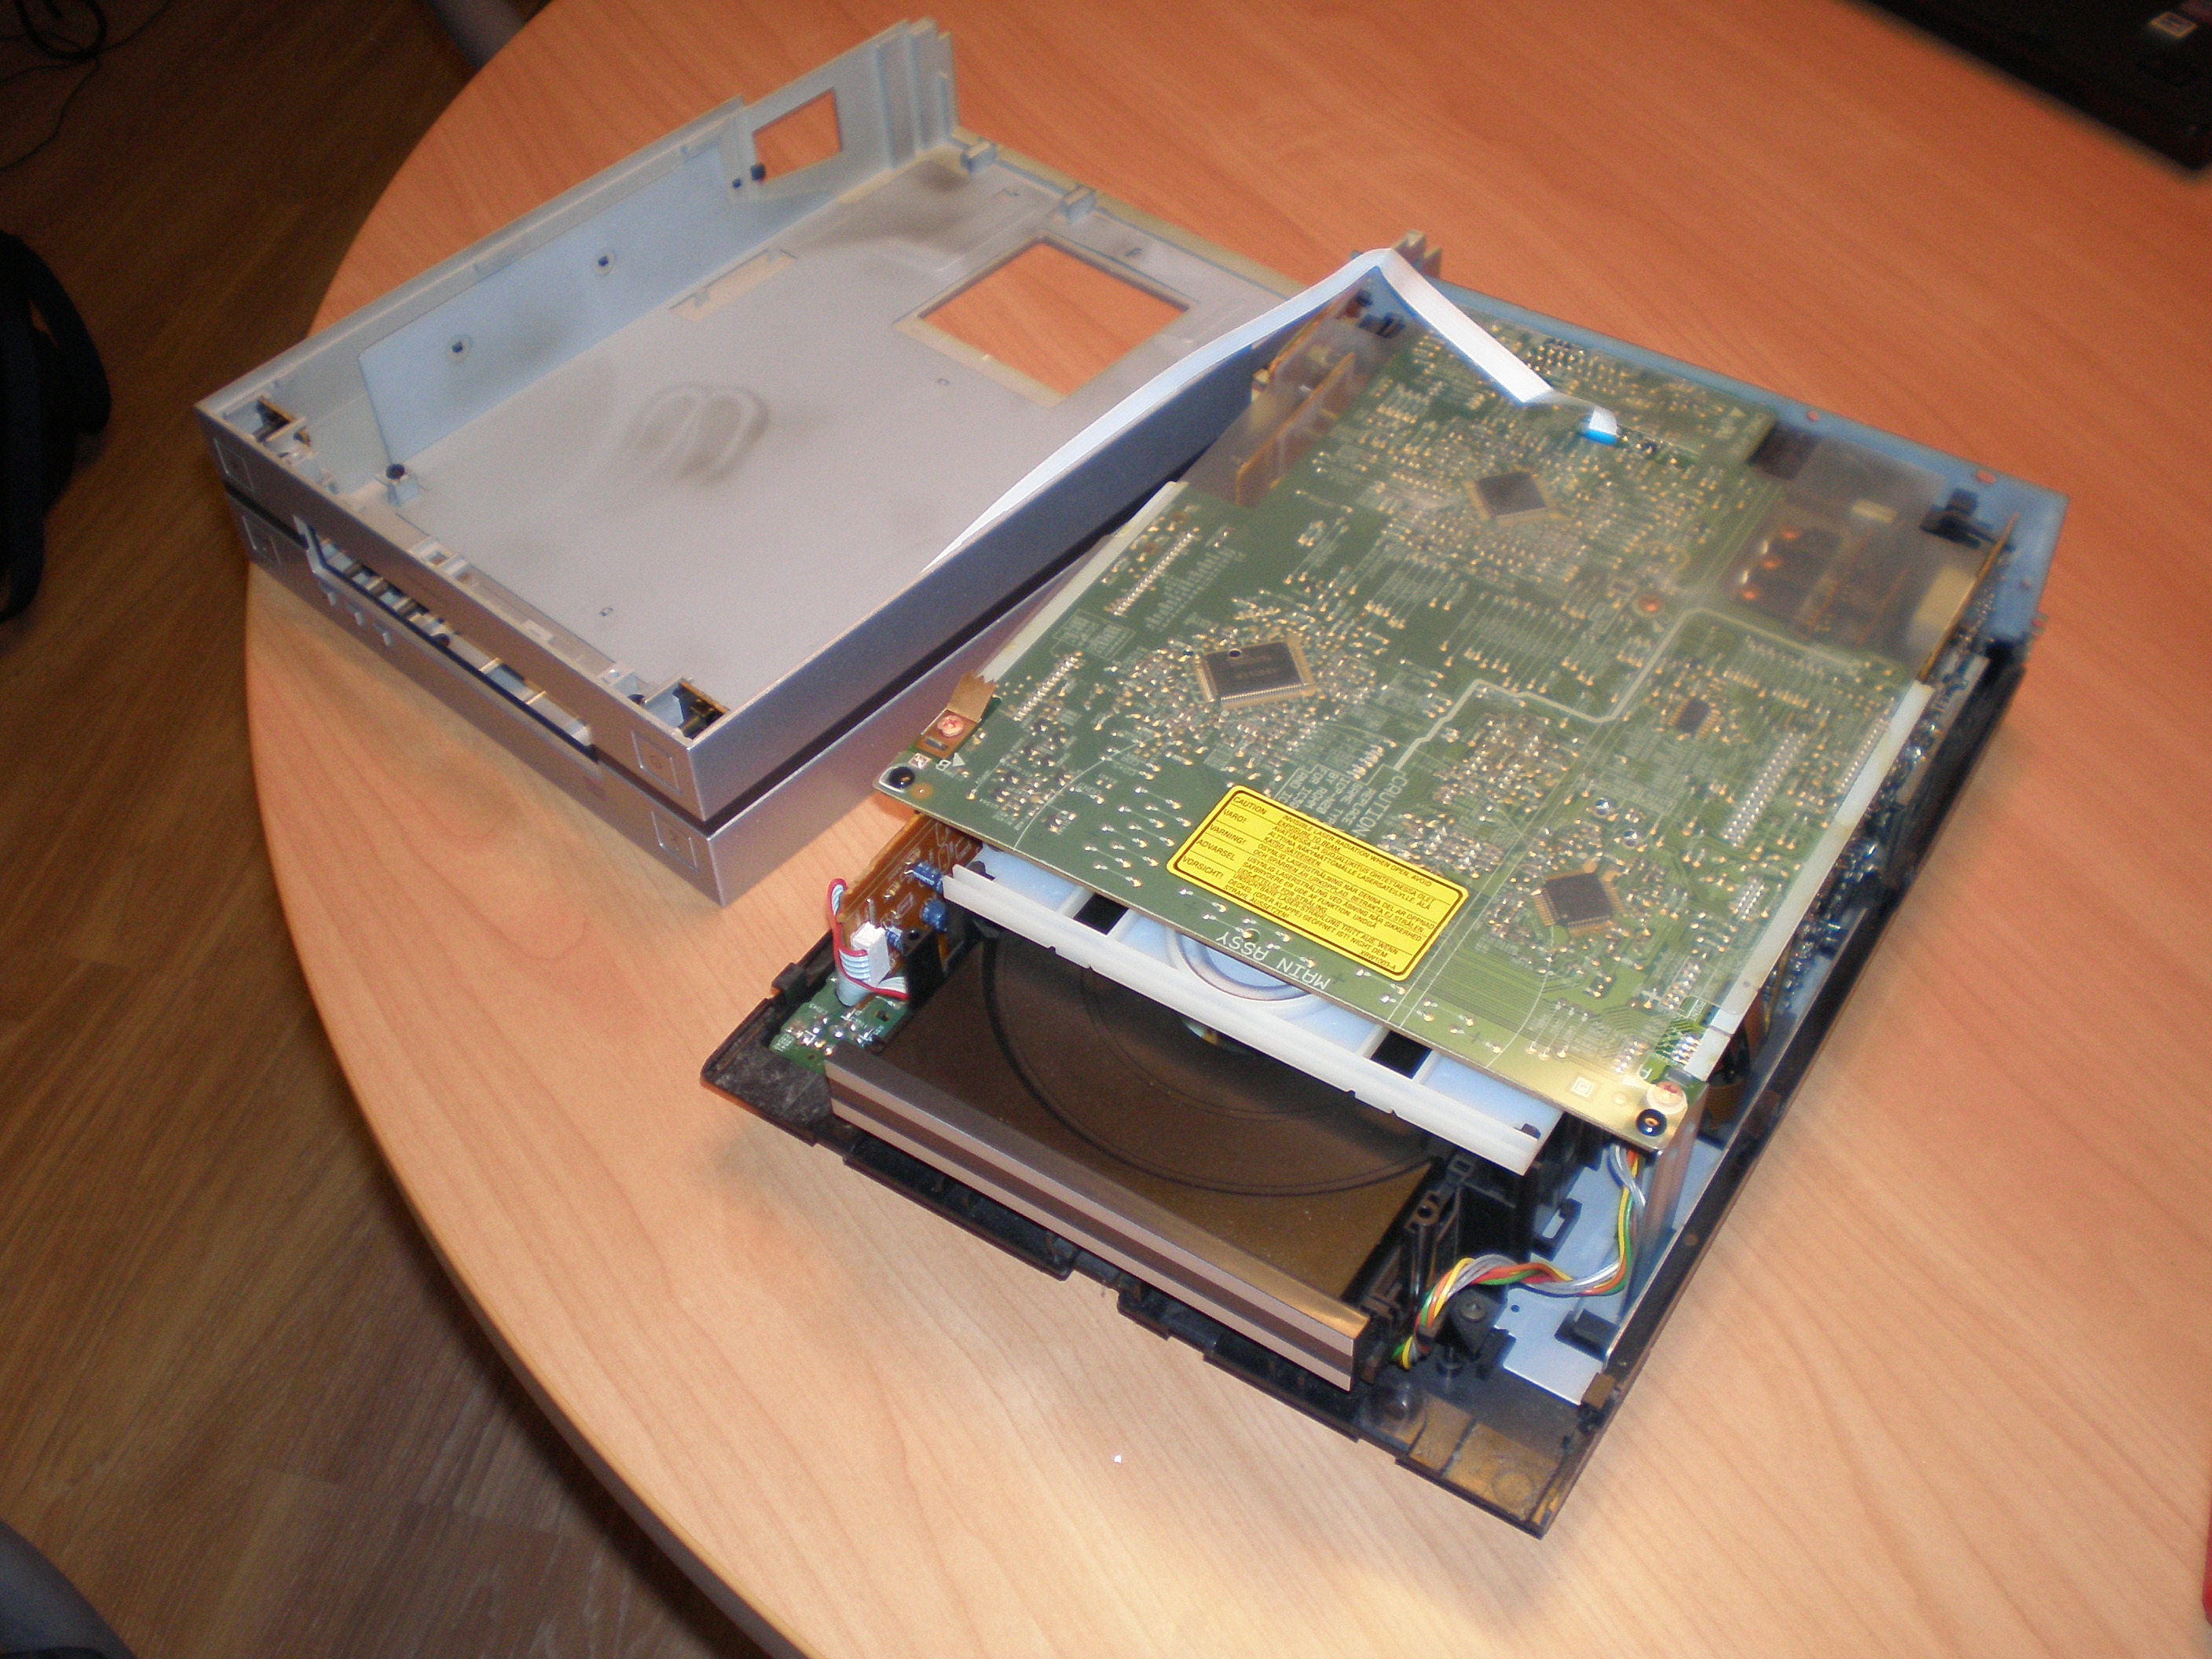
I’ll be showing you the innards of the Pioneer XC-L7, which is a mini system from about 15 years ago. It’s also one of the most beautiful and affordable systems released by Pioneer. The image above really doesn’t do it justics, but I couldn’t find any of the promo shots. The disadvantage of a mini system is that there’ll be a lot less room to work with, so there are probably more components to remove before you get to the lens.
This repair is for CD players that are mechanically still functioning (the tray works, CD spins), but have serious skipping issues with most of the CD’s you try. If some are still working, that’s actually a good sign for this kind of repair. There’s really not much equipment you’ll need:
- A set of screwdrivers. For most systems a Philips screwdriver will suffice, but for smaller systems (especially portable ones) you might need more specialized tools.
- If possible, a small plastic screwdriver to pry open cases and connectors. I used a flat metal screwdriver, but I would have felt safer with something plastic.
- Things to clean lenses: I uses a combination of eyeglasses cleaning tissue and cotton swaps. Don’t use any cleaning fluids not designed for lenses or glasses, you’ll only make things worse by damaging the lens or the coatings on the lens.
- A lot of patience. Really, a lot.
- A test CD, one that doesn’t play correct in the CD player, but that is not damaged (try it on your PC or another player)
Opening the case
Things to look for:
- Disconnect everything, especially the power cord!
- Take your time, and try to index all the screws you remove. They all look alike, but there are differences that you might only notice when reassembling.
- Look for arrows, they usually point to the screws you need to loosen to open stuff.
- Make sure you don’t break plastic covers that click into place.
- This really should be the easiest step. If you don’t feel comfortable doing this, you probably aren’t going to like what’s next.
Removing obstructions
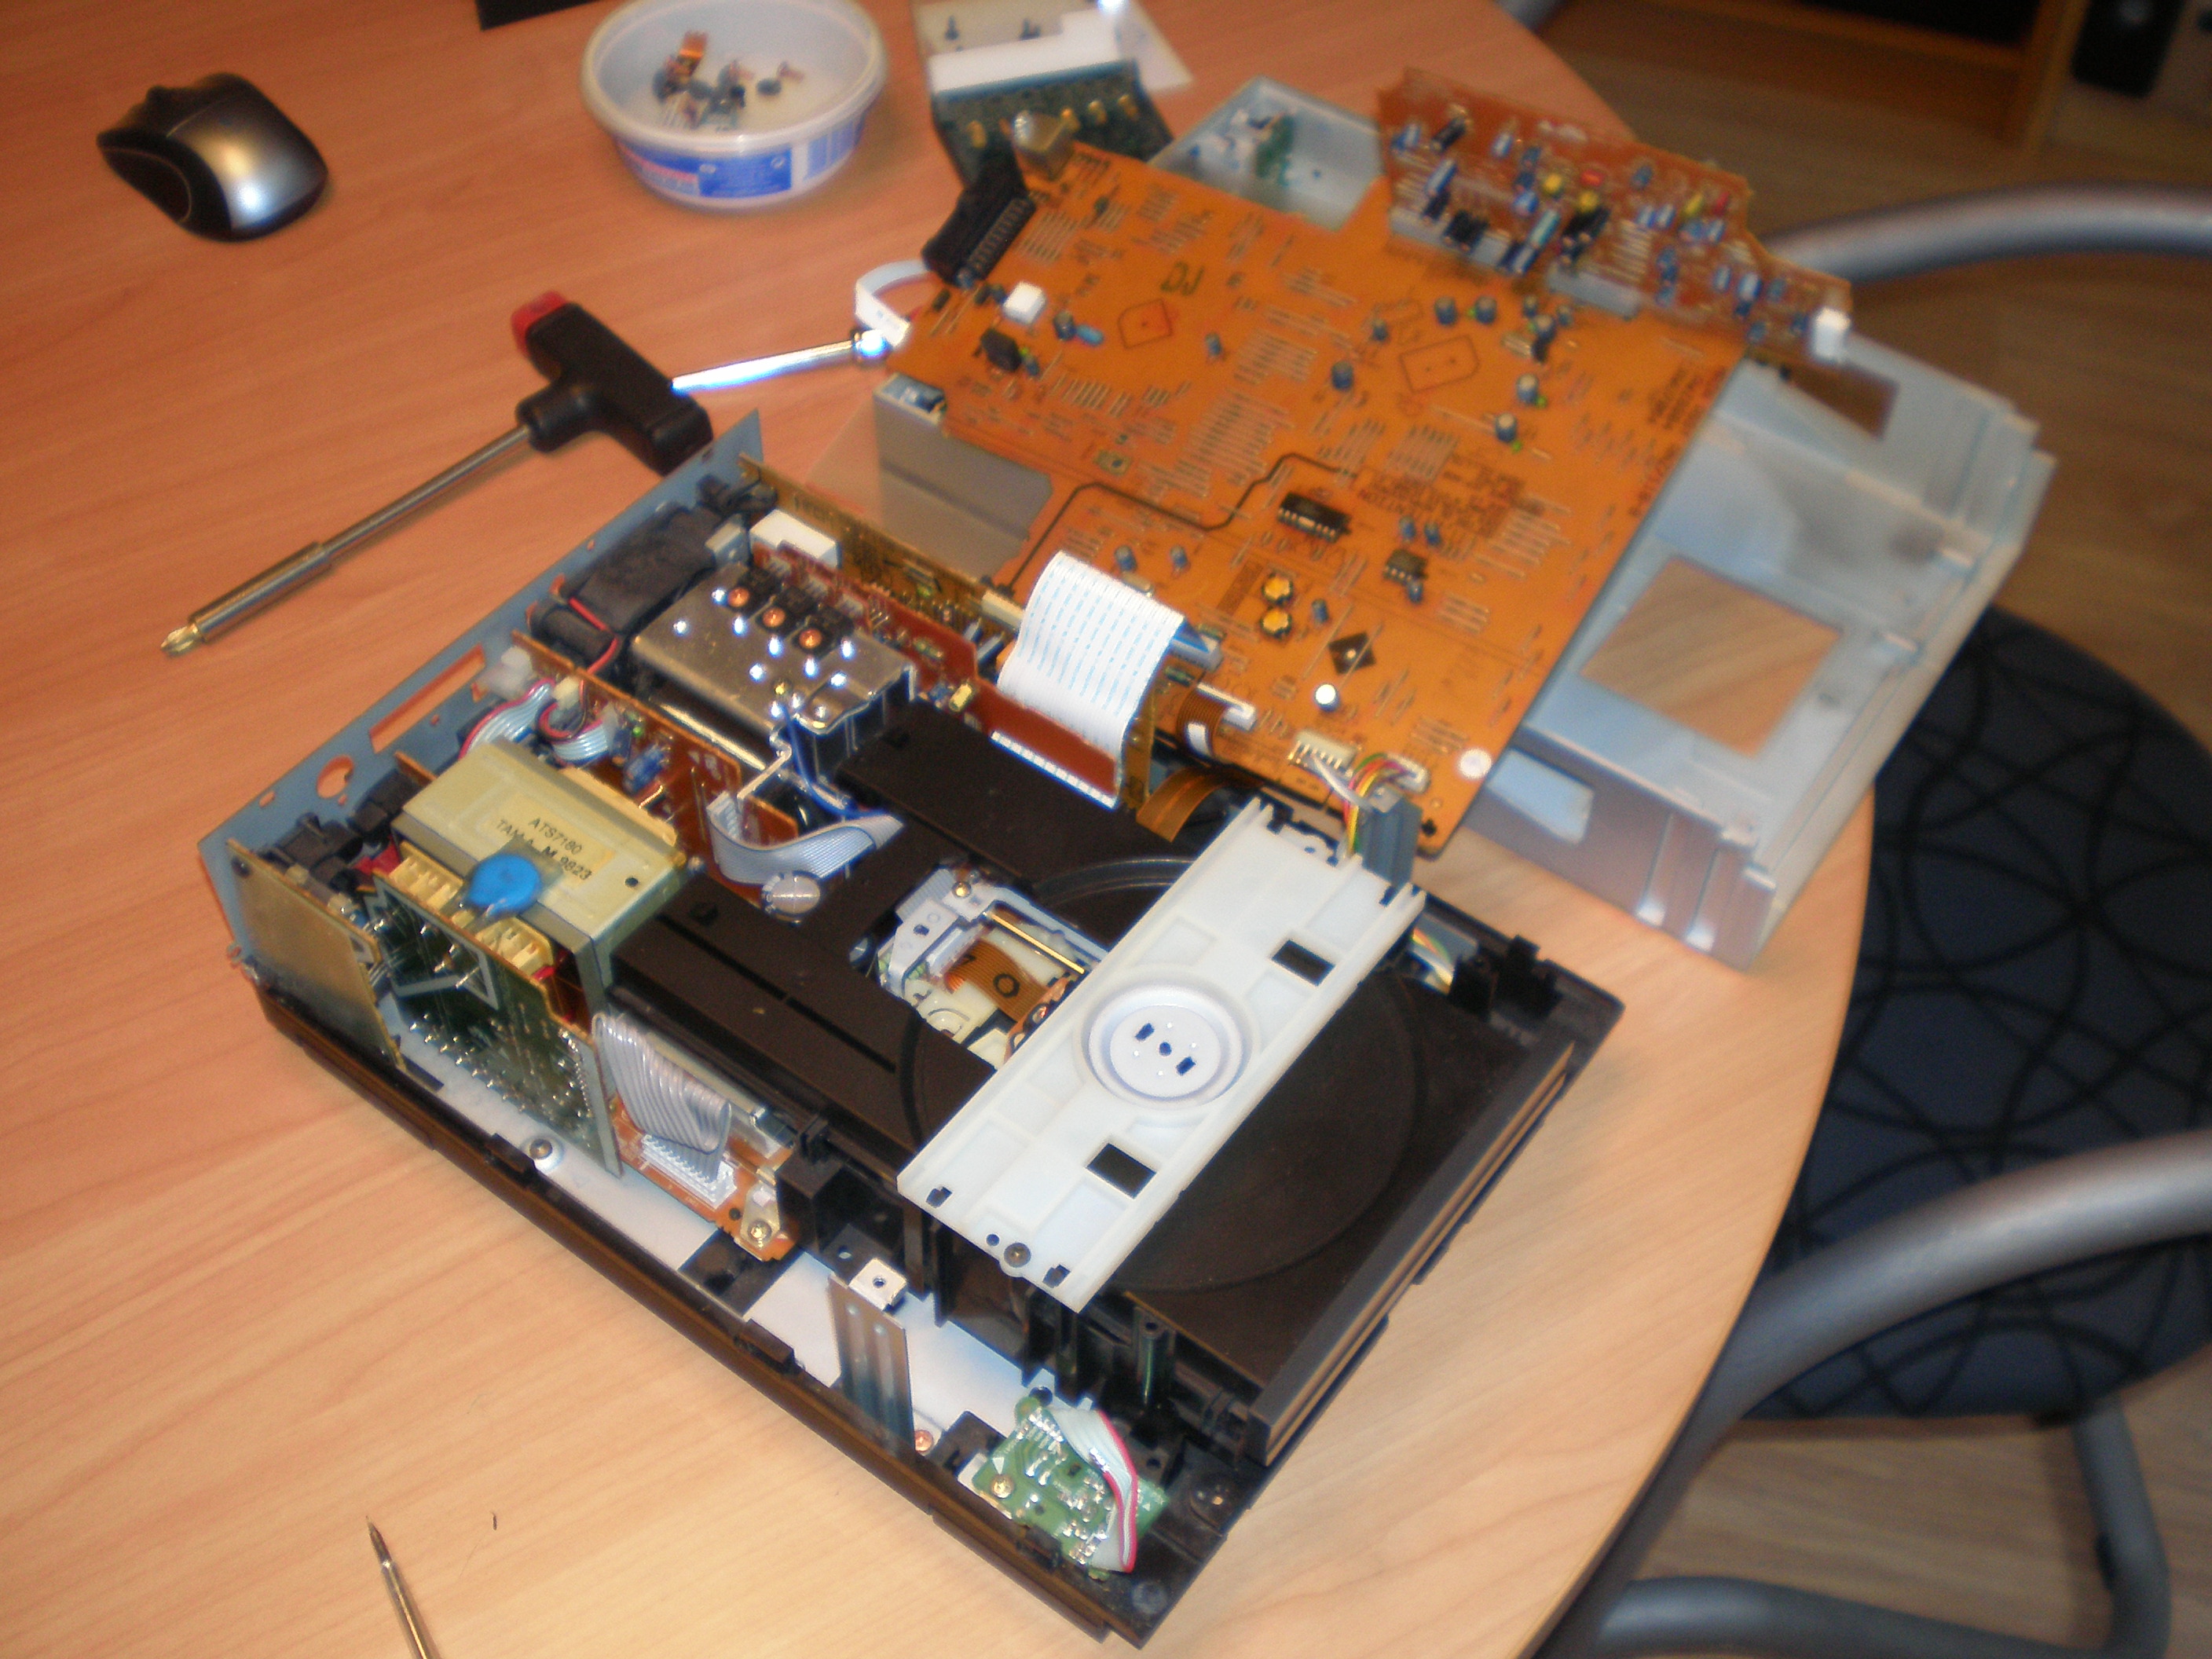
This is where it gets interesting. To reach the lens of the CD drive, there was a large (probably the main) circuit board blocking my path.
- Again I used the arrows to find the screws that needed to be removed. This time, they also had letters next to them so that I couldn’t miss any.
- However, I did miss 2 at first. The board had 2 connectors on the back of the device that were also fastened with a screw.
- Once you think all screws are removed, carefully look around and try to figure out all the wires and connectors going into the board.
- Now’s not the time to hurry, because you certainly don’t want to break any connections, this will be almost impossible to repair (unless you have a soldering iron and replacements handy)
- Take your time and disconnect everything, remember (or write down) where everything goes.
At this point I got my first glimpse at the lens
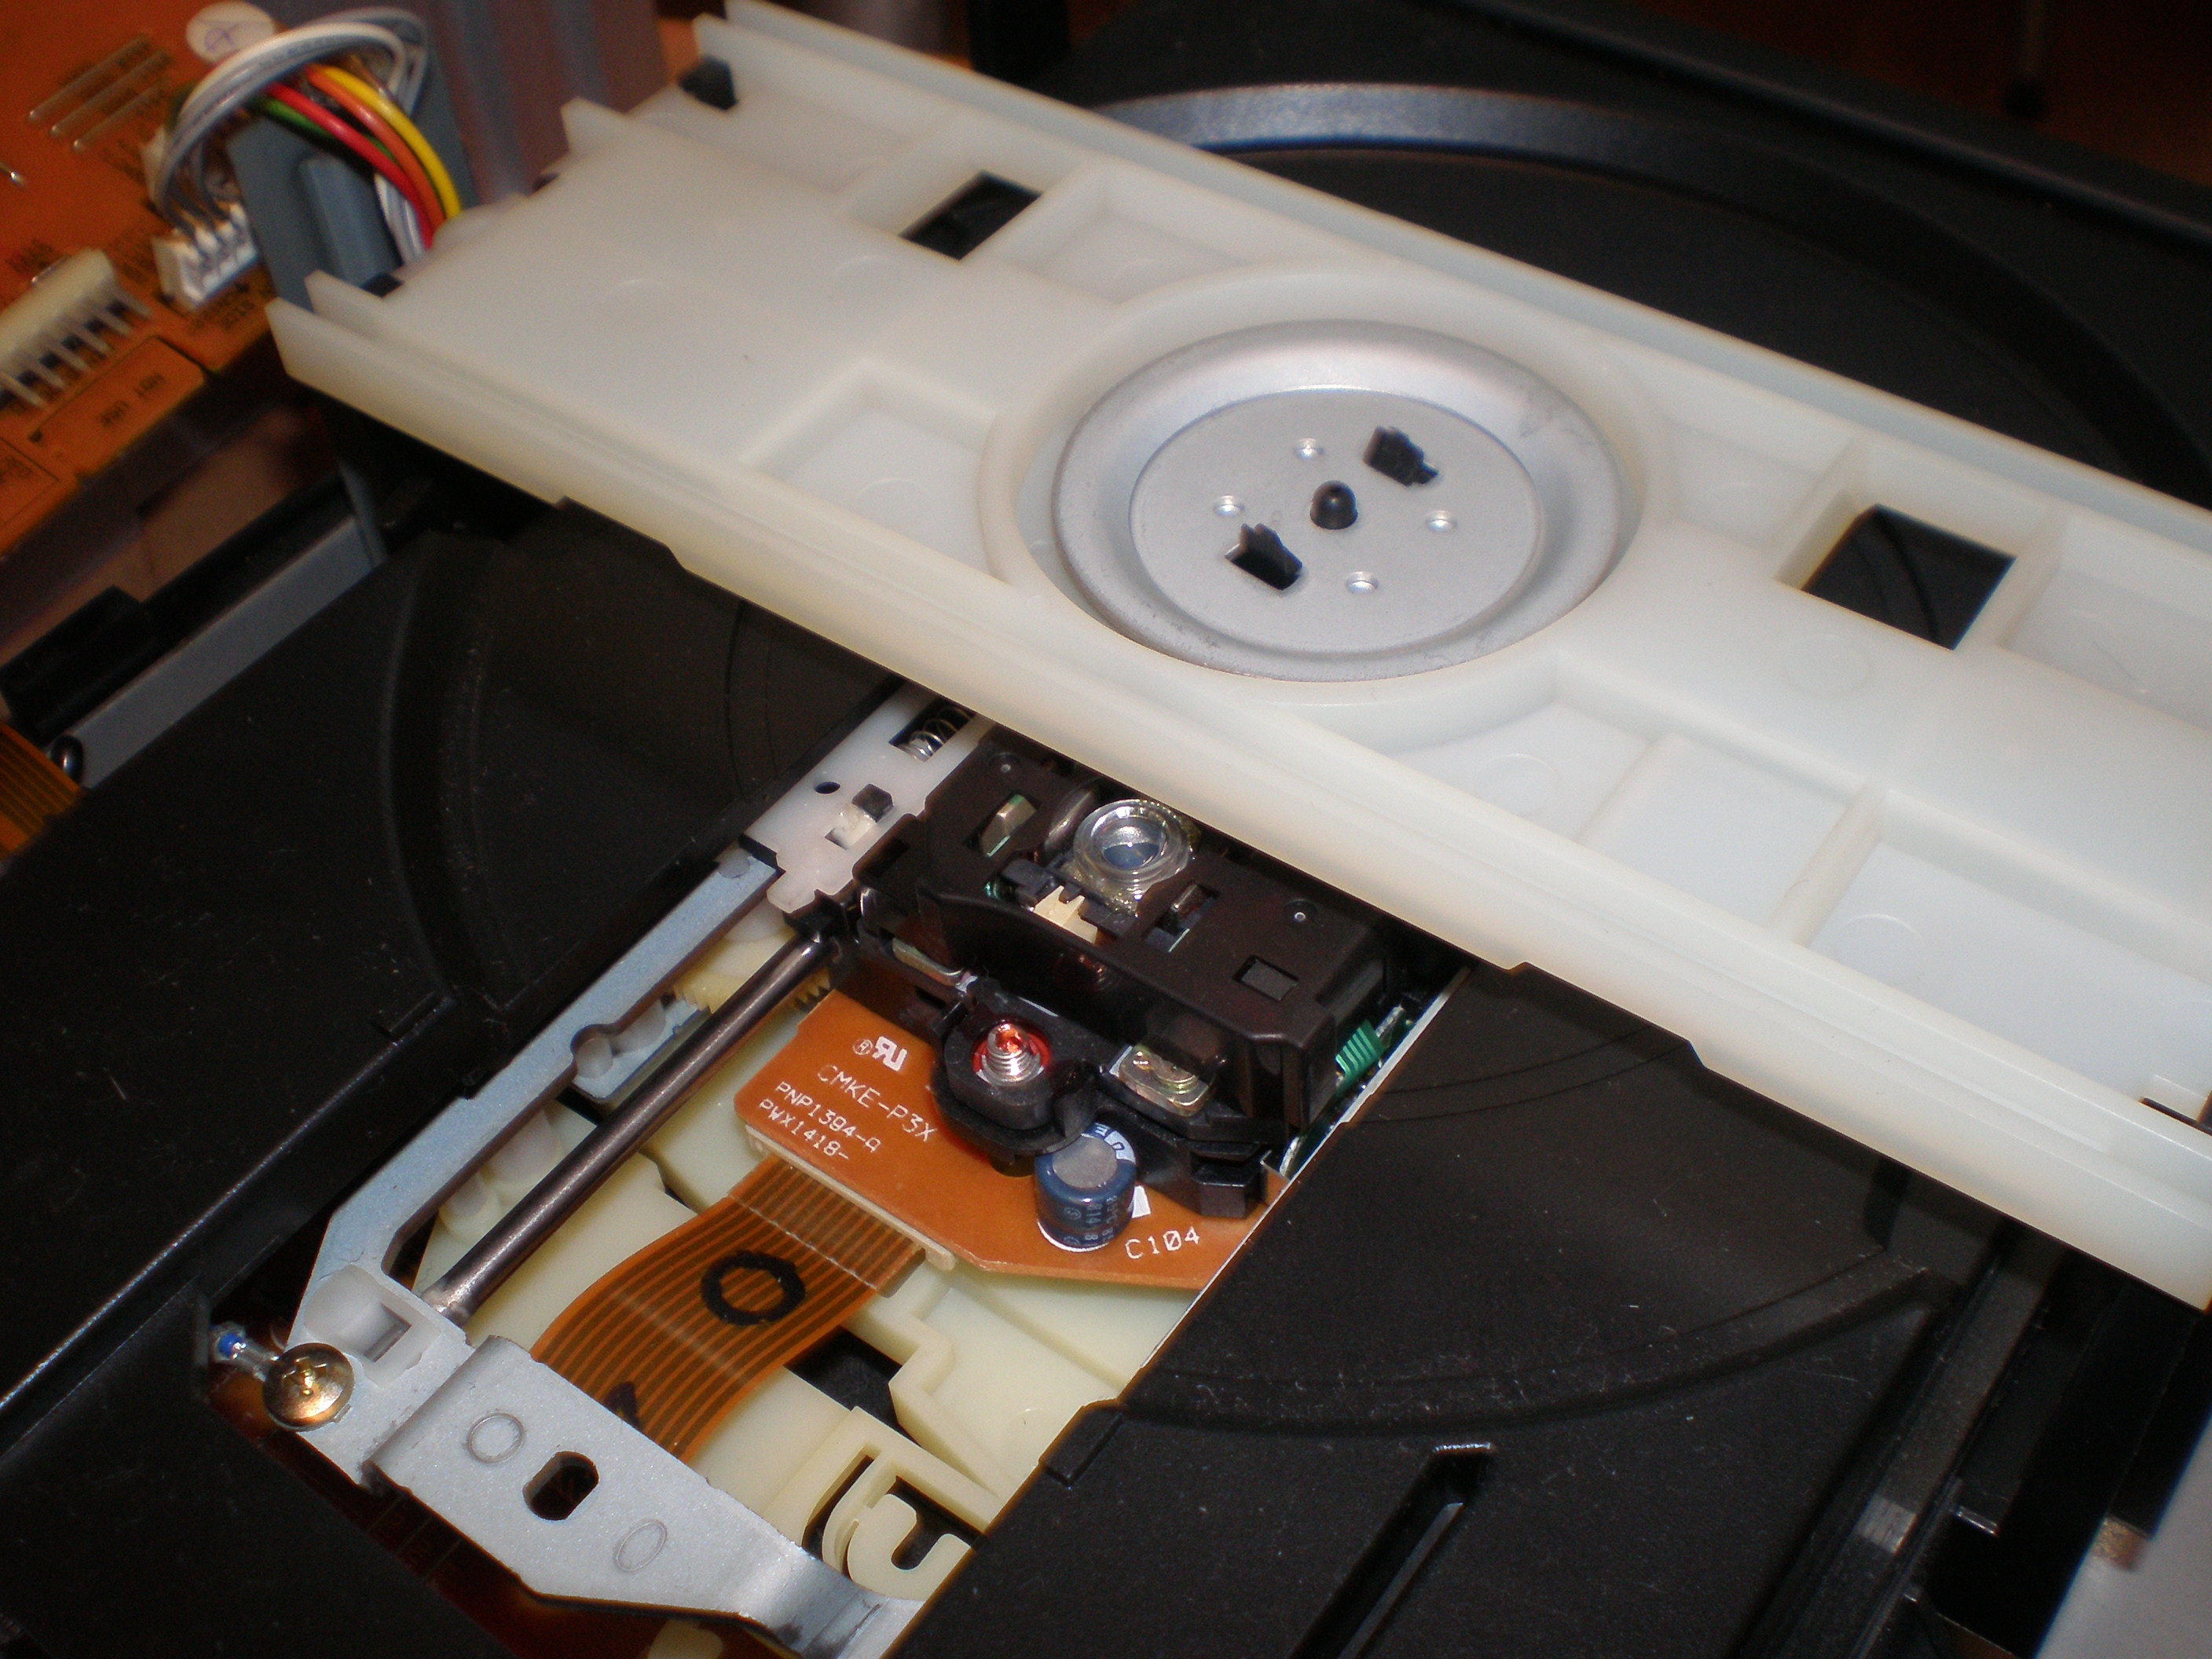
I could have cleaned the lens right there, but the white plastic thingie was easy to remove, so I went ahead and got a clear path to the lens.
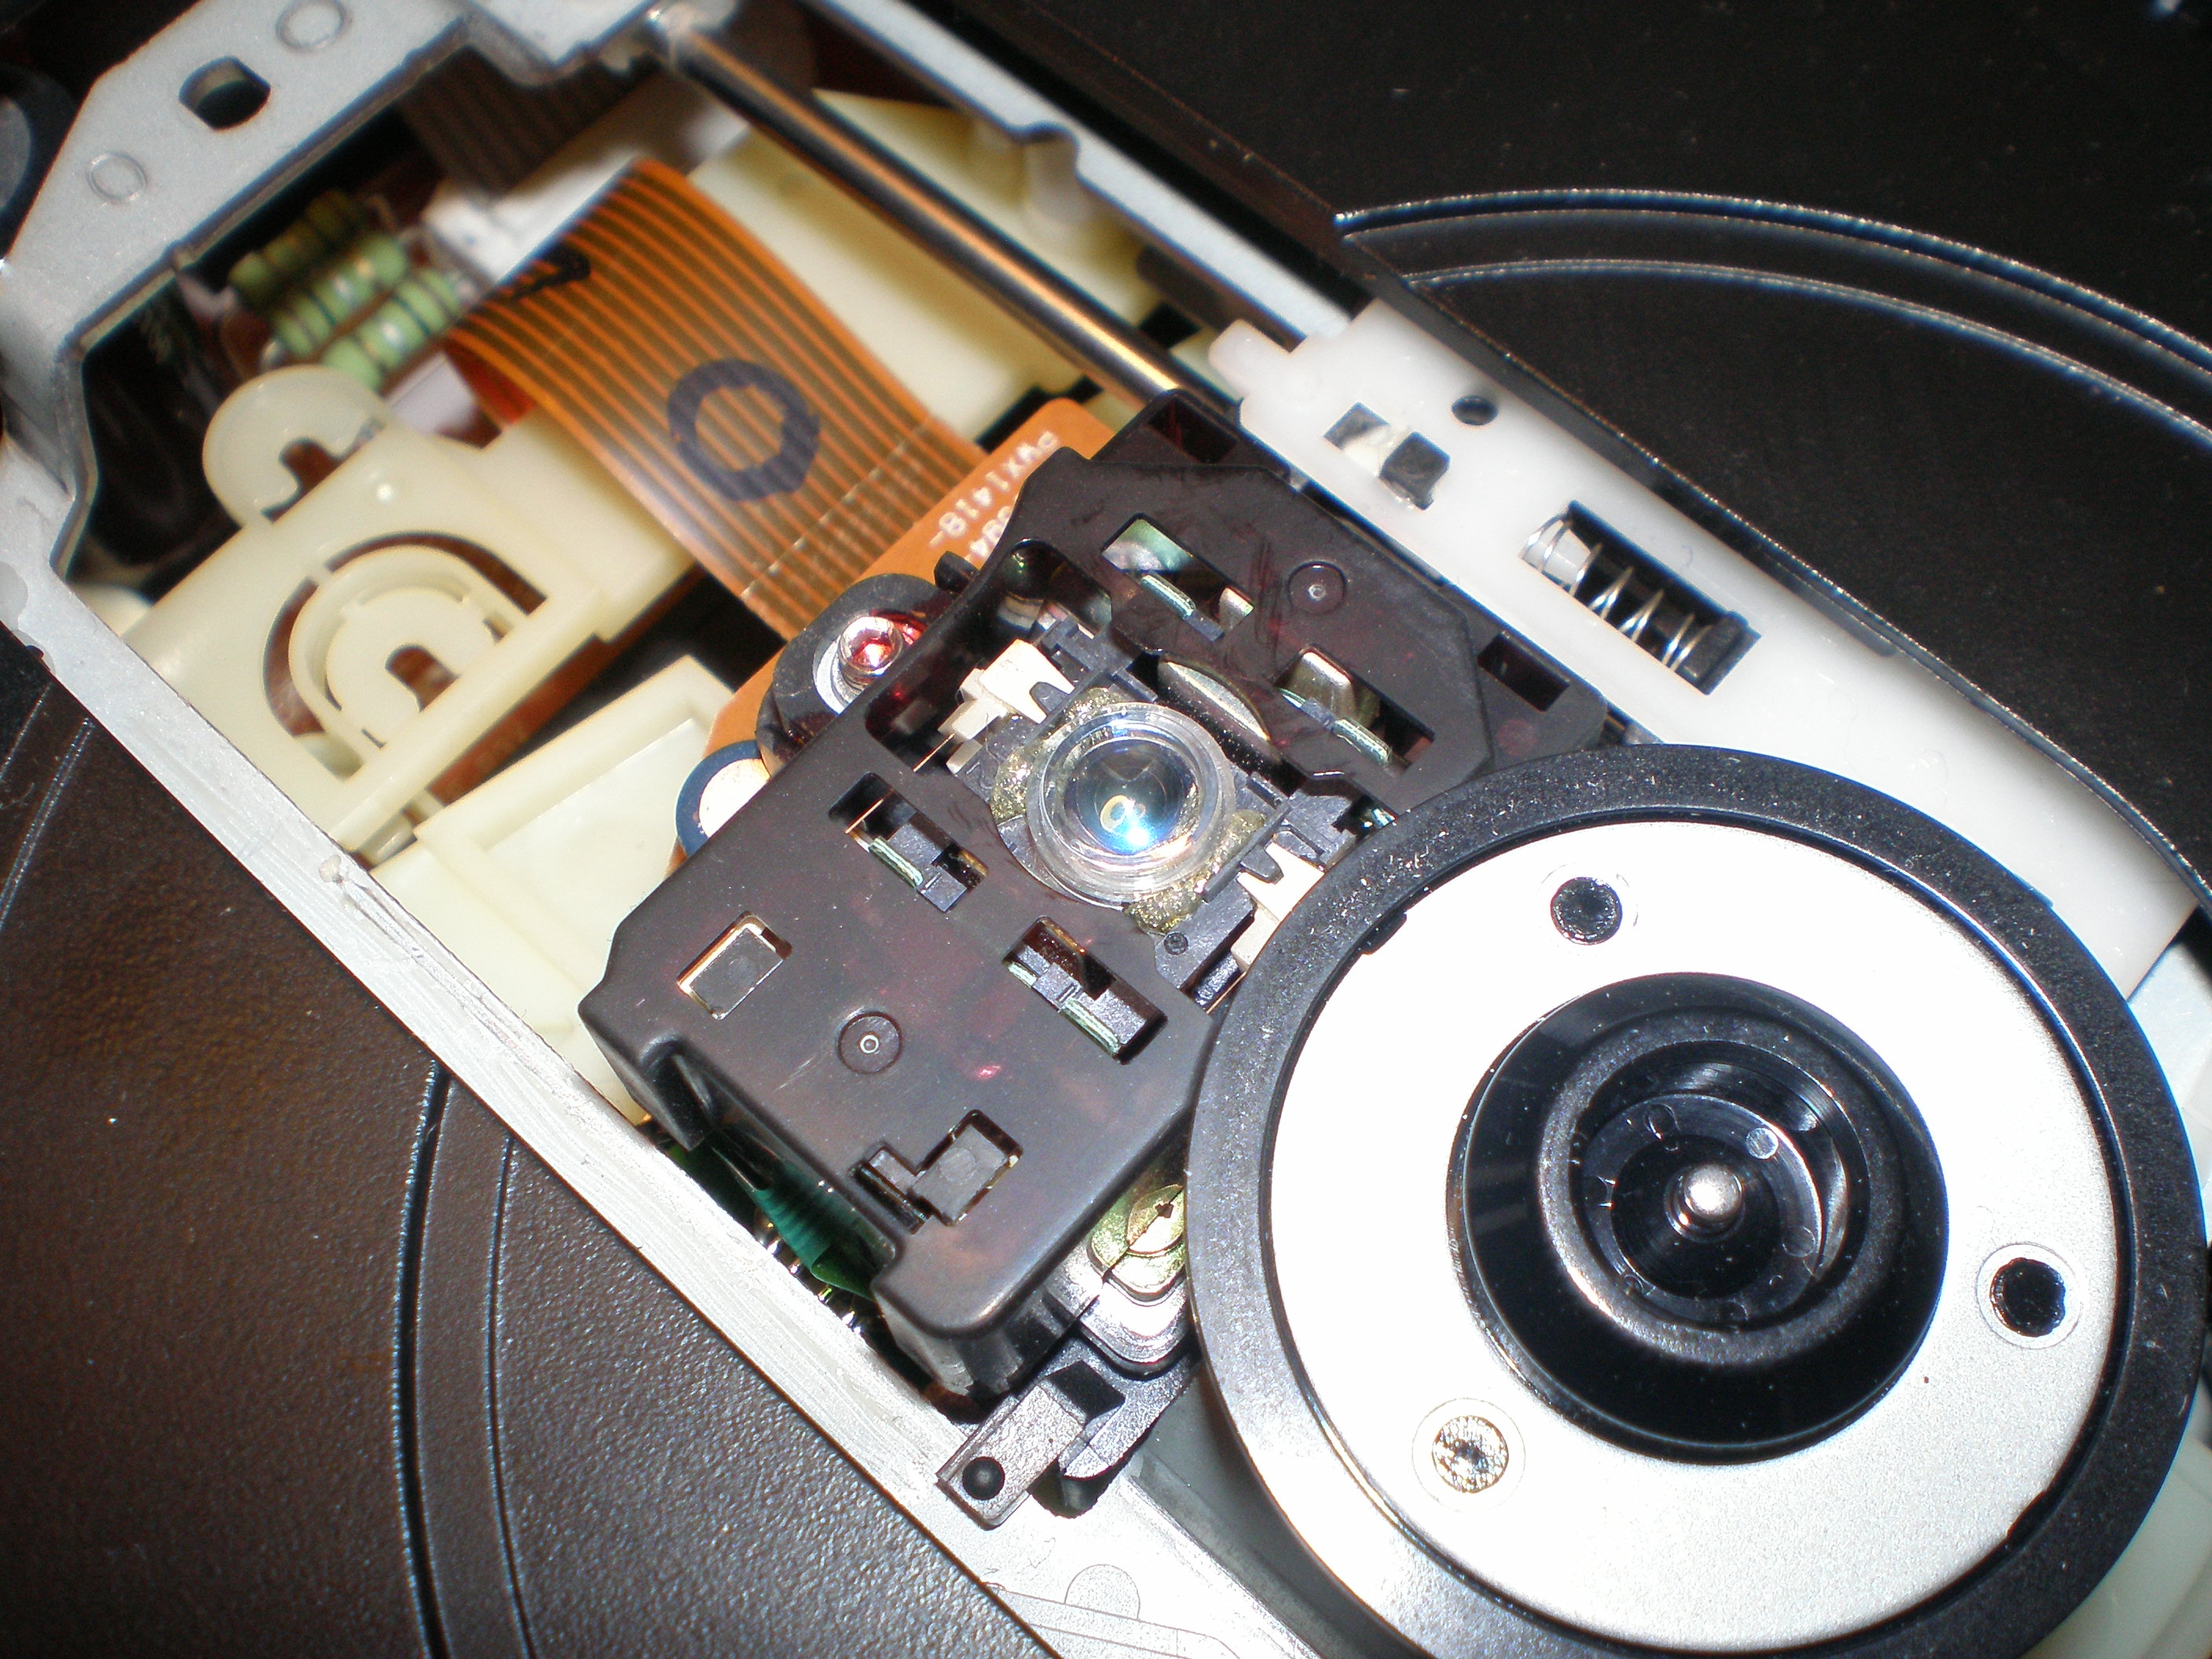
It’s the translucent, blue-ish round thing in the center of the picture. Try to not touch it with your fingers as you might put extra grease on it, use whatever lens cleaning product you have and finally use the cotton swap to dry it. Be very gentle. The lens will move a bit, don’t worry about it, that’s perfectly normal.
Testing
Now is the time to test it. You’ll have to partially reconstruct the player. Reconnect all wires and connectors. It’s probably also a good idea to put copper screws (red-ish brown) back in their place. They might conduct electricity and could be essential for the workings of the player.
I put in my test CD and it worked flawlessly. I tried a few more CDs and must say I was rather impressed that such a simple operation could solve all issues I’d had with the player.
If this doesn’t help for you, here are 2 more resources that might be useful. A short guide on changing the laser power on Kuro5hin and a very in depth FAQ. But again, most of the skipping-related problems are caused by a dirty lens. So try this first.
Thus came the reassembly. Which, as you might guess, is a lot easier.
- Don’t tighten screws too much. Especially in plastic you might damage something.
- Put everything back in its place. My player had a plastic shield between the mainboard and the cover. I’m pretty sure that one is essential to avoid short circuiting anything.
That’s really all there is to it. This will take you anywhere from 15 minutes to 2 hours, but it might save you an expensive repair or an even more expensive new player. So what do you have to loose?