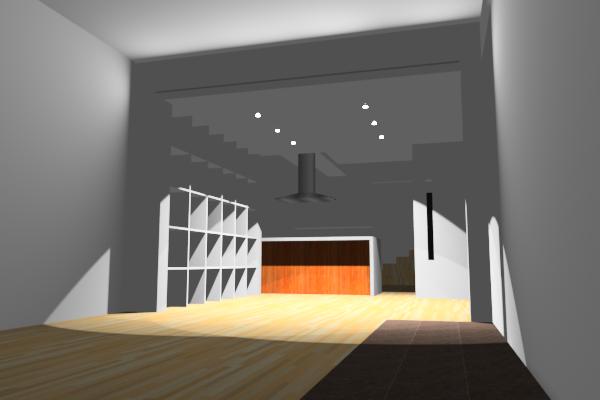
Sure, it is not yet finished and polished at all, but there used to be a time that creating the model above, texturing it and adding the lighting, would take you days. Now you can do it all in a few hours (and that includes setup time of the raytracing engine). It’s 3D modelling for the masses. And it’s all free.
Tip: I’ve included a few tips in the article that you won’t need when you are just starting out. I’ve labeled them so you can just skip them if you want.
![]() Get yourself the free version of SketchUp. SketchUp is difficult to compare to other 3D tools. It uses a very intuitive interface to create 3D objects. To get started, take a look at some of the tutorials and you should be modelling within the hour. SketchUp is primarily suited for architects and engineers. Basically anything that has right angles and flat surfaces. If you want to model more organic shapes, it might be a little more challenging. In all honesty, I haven’t tried it yet, so if you have, leave a comment to tell me how it went.
Get yourself the free version of SketchUp. SketchUp is difficult to compare to other 3D tools. It uses a very intuitive interface to create 3D objects. To get started, take a look at some of the tutorials and you should be modelling within the hour. SketchUp is primarily suited for architects and engineers. Basically anything that has right angles and flat surfaces. If you want to model more organic shapes, it might be a little more challenging. In all honesty, I haven’t tried it yet, so if you have, leave a comment to tell me how it went.
Tip: There is also a pro version available, but I doubt you’ll need it. There is one difference to keep in mind once you start rendering, and that is that you cannot configure the solar orientation in the free version of SketchUp. You can always rotate your object, but that means you will loose handy abilities to draw along your two horizontal axises. I would suggest to first draw the model and when it’s almost finished, rotate it. At that point you will have plenty of guides to help you, so you won’t miss the axises that much. If you are modelling a building, you’ll also need Google Earth (also free) if you want to configure the location.
![]() SketchUp does have some limited raytracing functions. Out-of-the-box it can give you an impression of the shadows casted by the sun. Raytracing is what you need when you want to calculate exactly how lightrays will behave on your model. SketchUp, however, does not allow you to add light sources or do any real raytracing, so you are very limited.
SketchUp does have some limited raytracing functions. Out-of-the-box it can give you an impression of the shadows casted by the sun. Raytracing is what you need when you want to calculate exactly how lightrays will behave on your model. SketchUp, however, does not allow you to add light sources or do any real raytracing, so you are very limited.
You could export your model into a package such as Blender, but that would make roundtrip modelling difficult: once you export to Blender, it’s difficult, if not impossible to change the model in SketchUp.
My preferred solution right now is the IRender nXt raytracing plugin for SketchUp. It integrates perfectly and makes it easy to add lights and start your renders. This IRender wiki article should get you started right away. Currently IRender nXt is completely free, however, it still is beta software and once finalized, it will probably cost you quite a bit. So enjoy it while you can.
Tip: Watch out when introducing sunlight into your traces. It will seriously slow down the process and you risk running into the predefined limits. By default, the IRender nXt engine is configured to stop after 10 minutes. Usually I don’t have a nice result yet at that point if I enable sunlight, so I’ve increased this number.