So you’ve got this awesome Ultimaker 3 printer with a build-in webcam. But no way to record and review your prints later on. Are you going to sit around, babysitting your printer at night?
Well, no, you don’t have to! The webcam broadcasts a video that you can watch (and record) from anywhere in your network.
There are two steps to recording your video:
- Find the IP address of your printer. It’s three clicks in the printer’s menu.
- Record the broadcast using your preferred software. Tip: VLC works on almost any platform and is free.
Find the IP address
When your printer is powered on, pick “System” from the root menu:
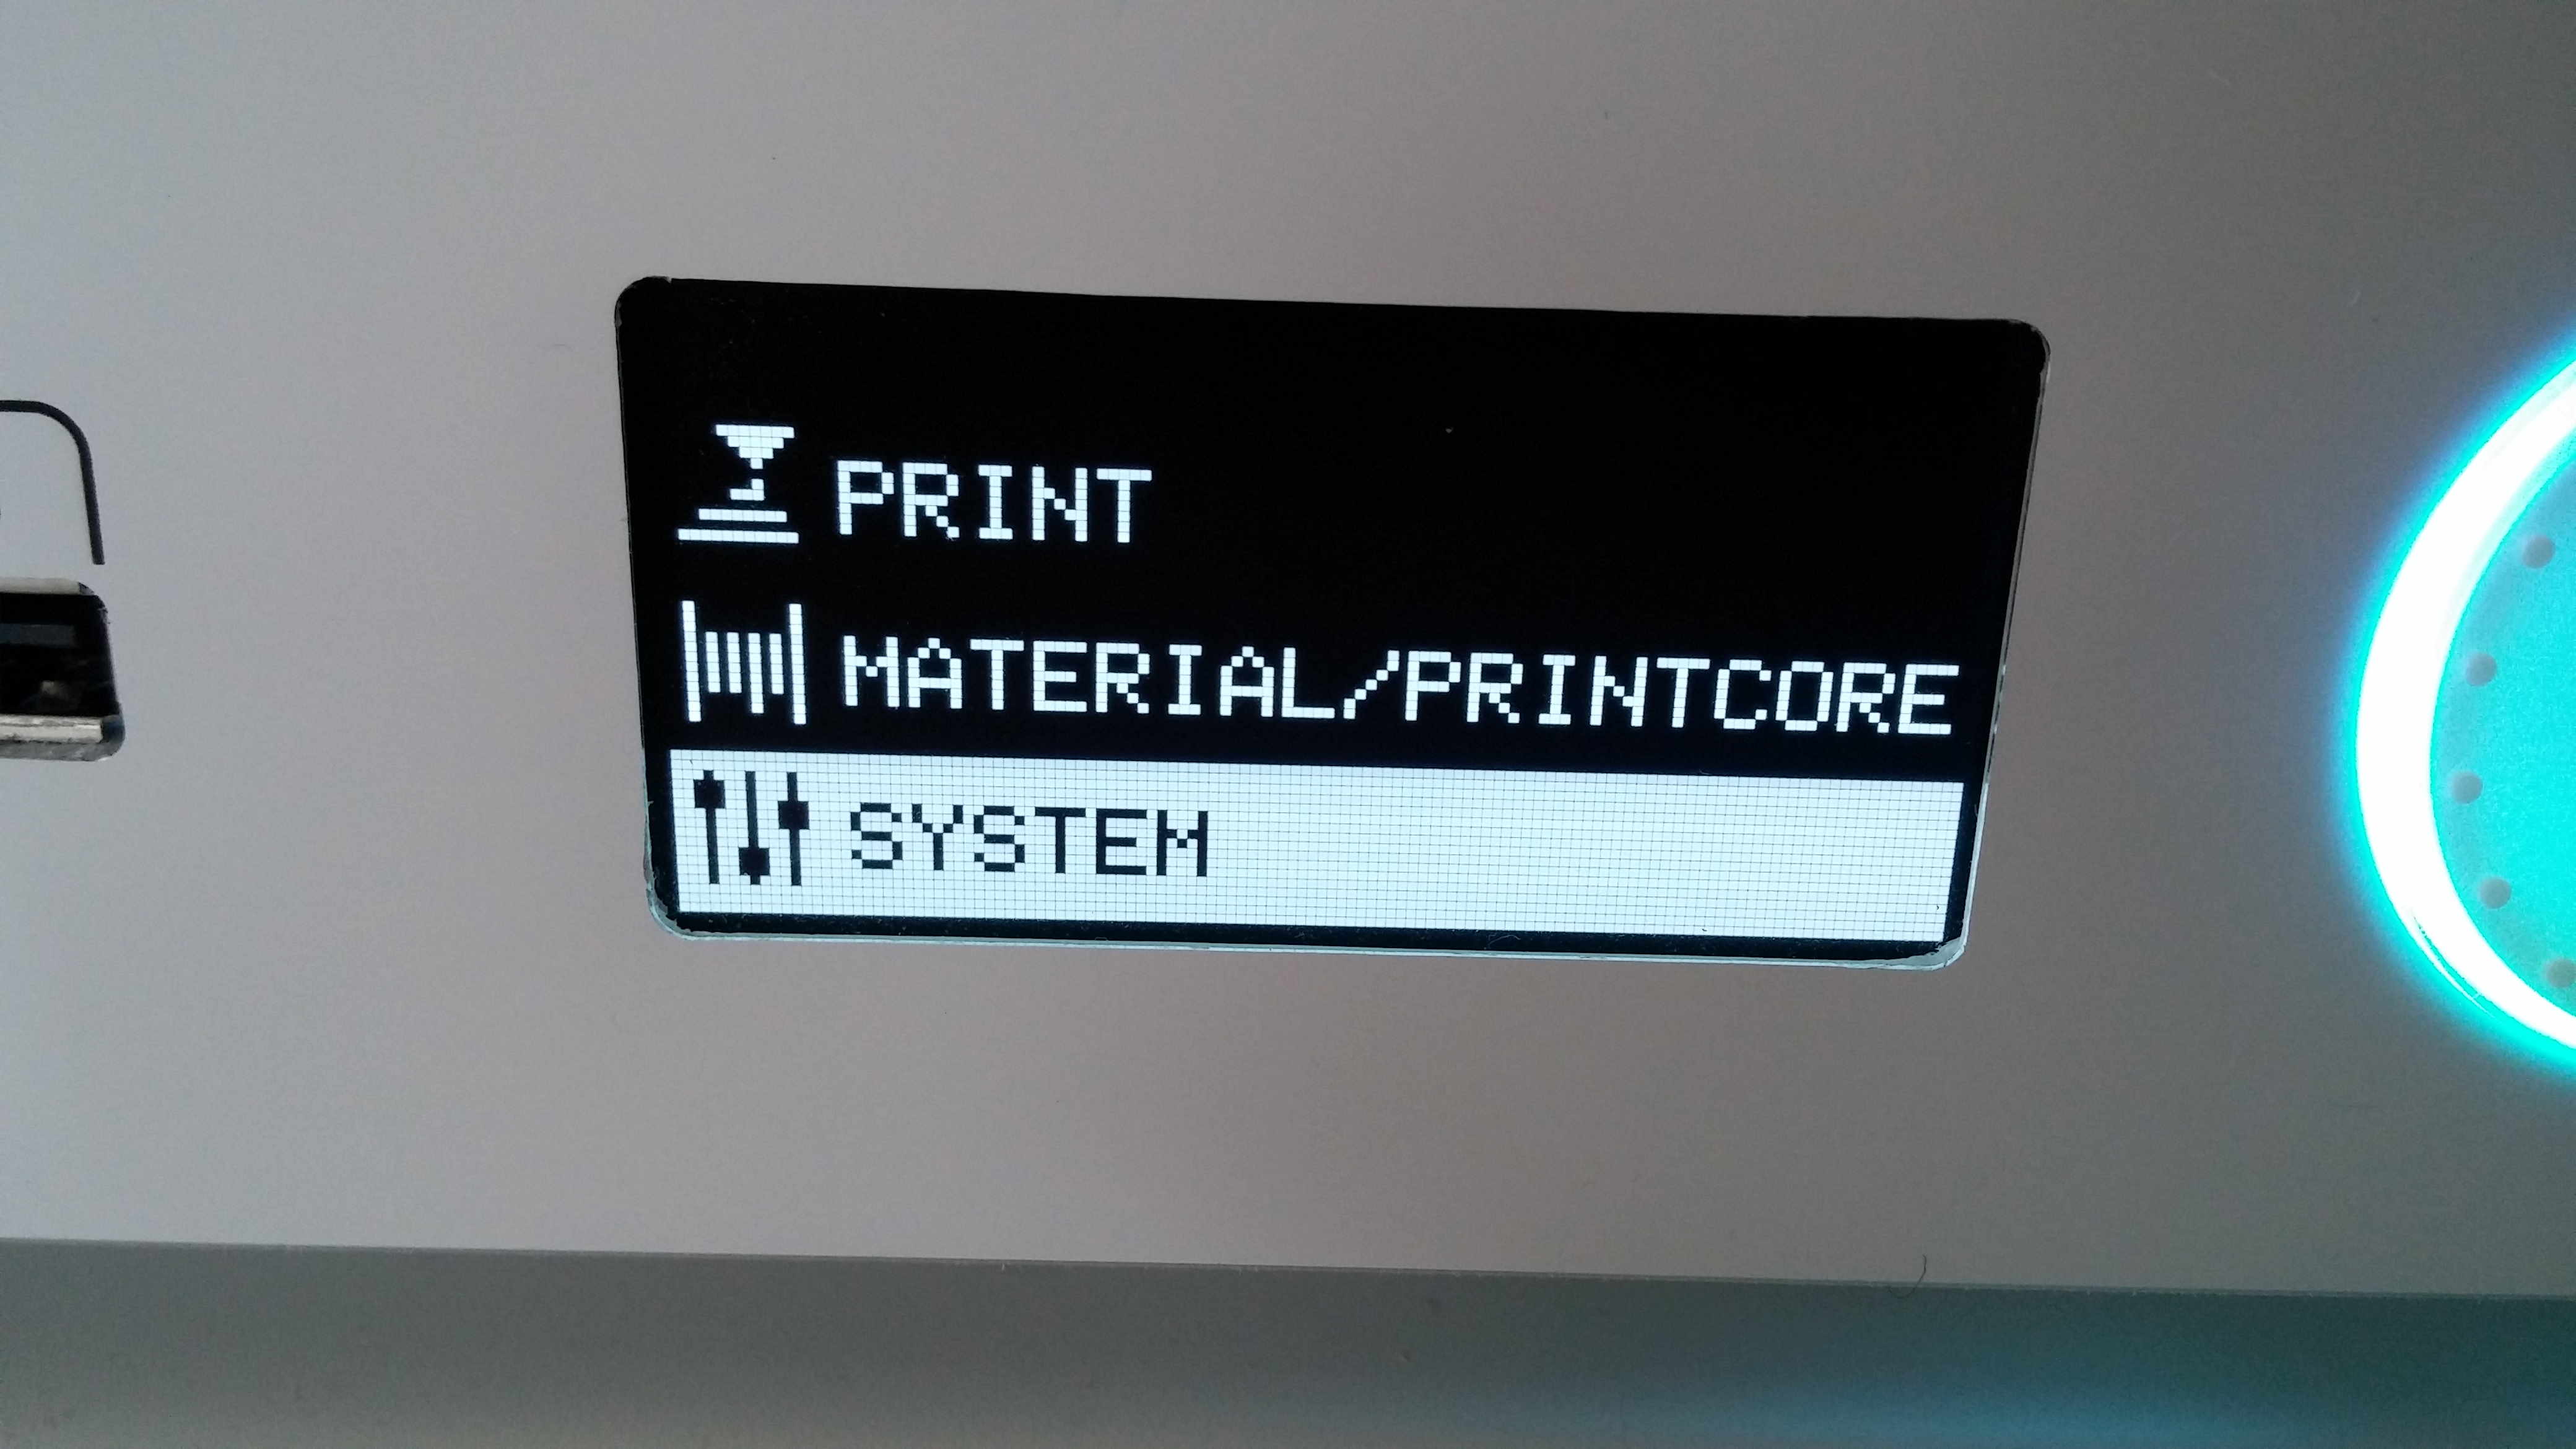 <figcaption class="wp-caption-text">Ultimaker 3 main menu with System option highlighted.</figcaption></figure>
Now open the “Network” menu:
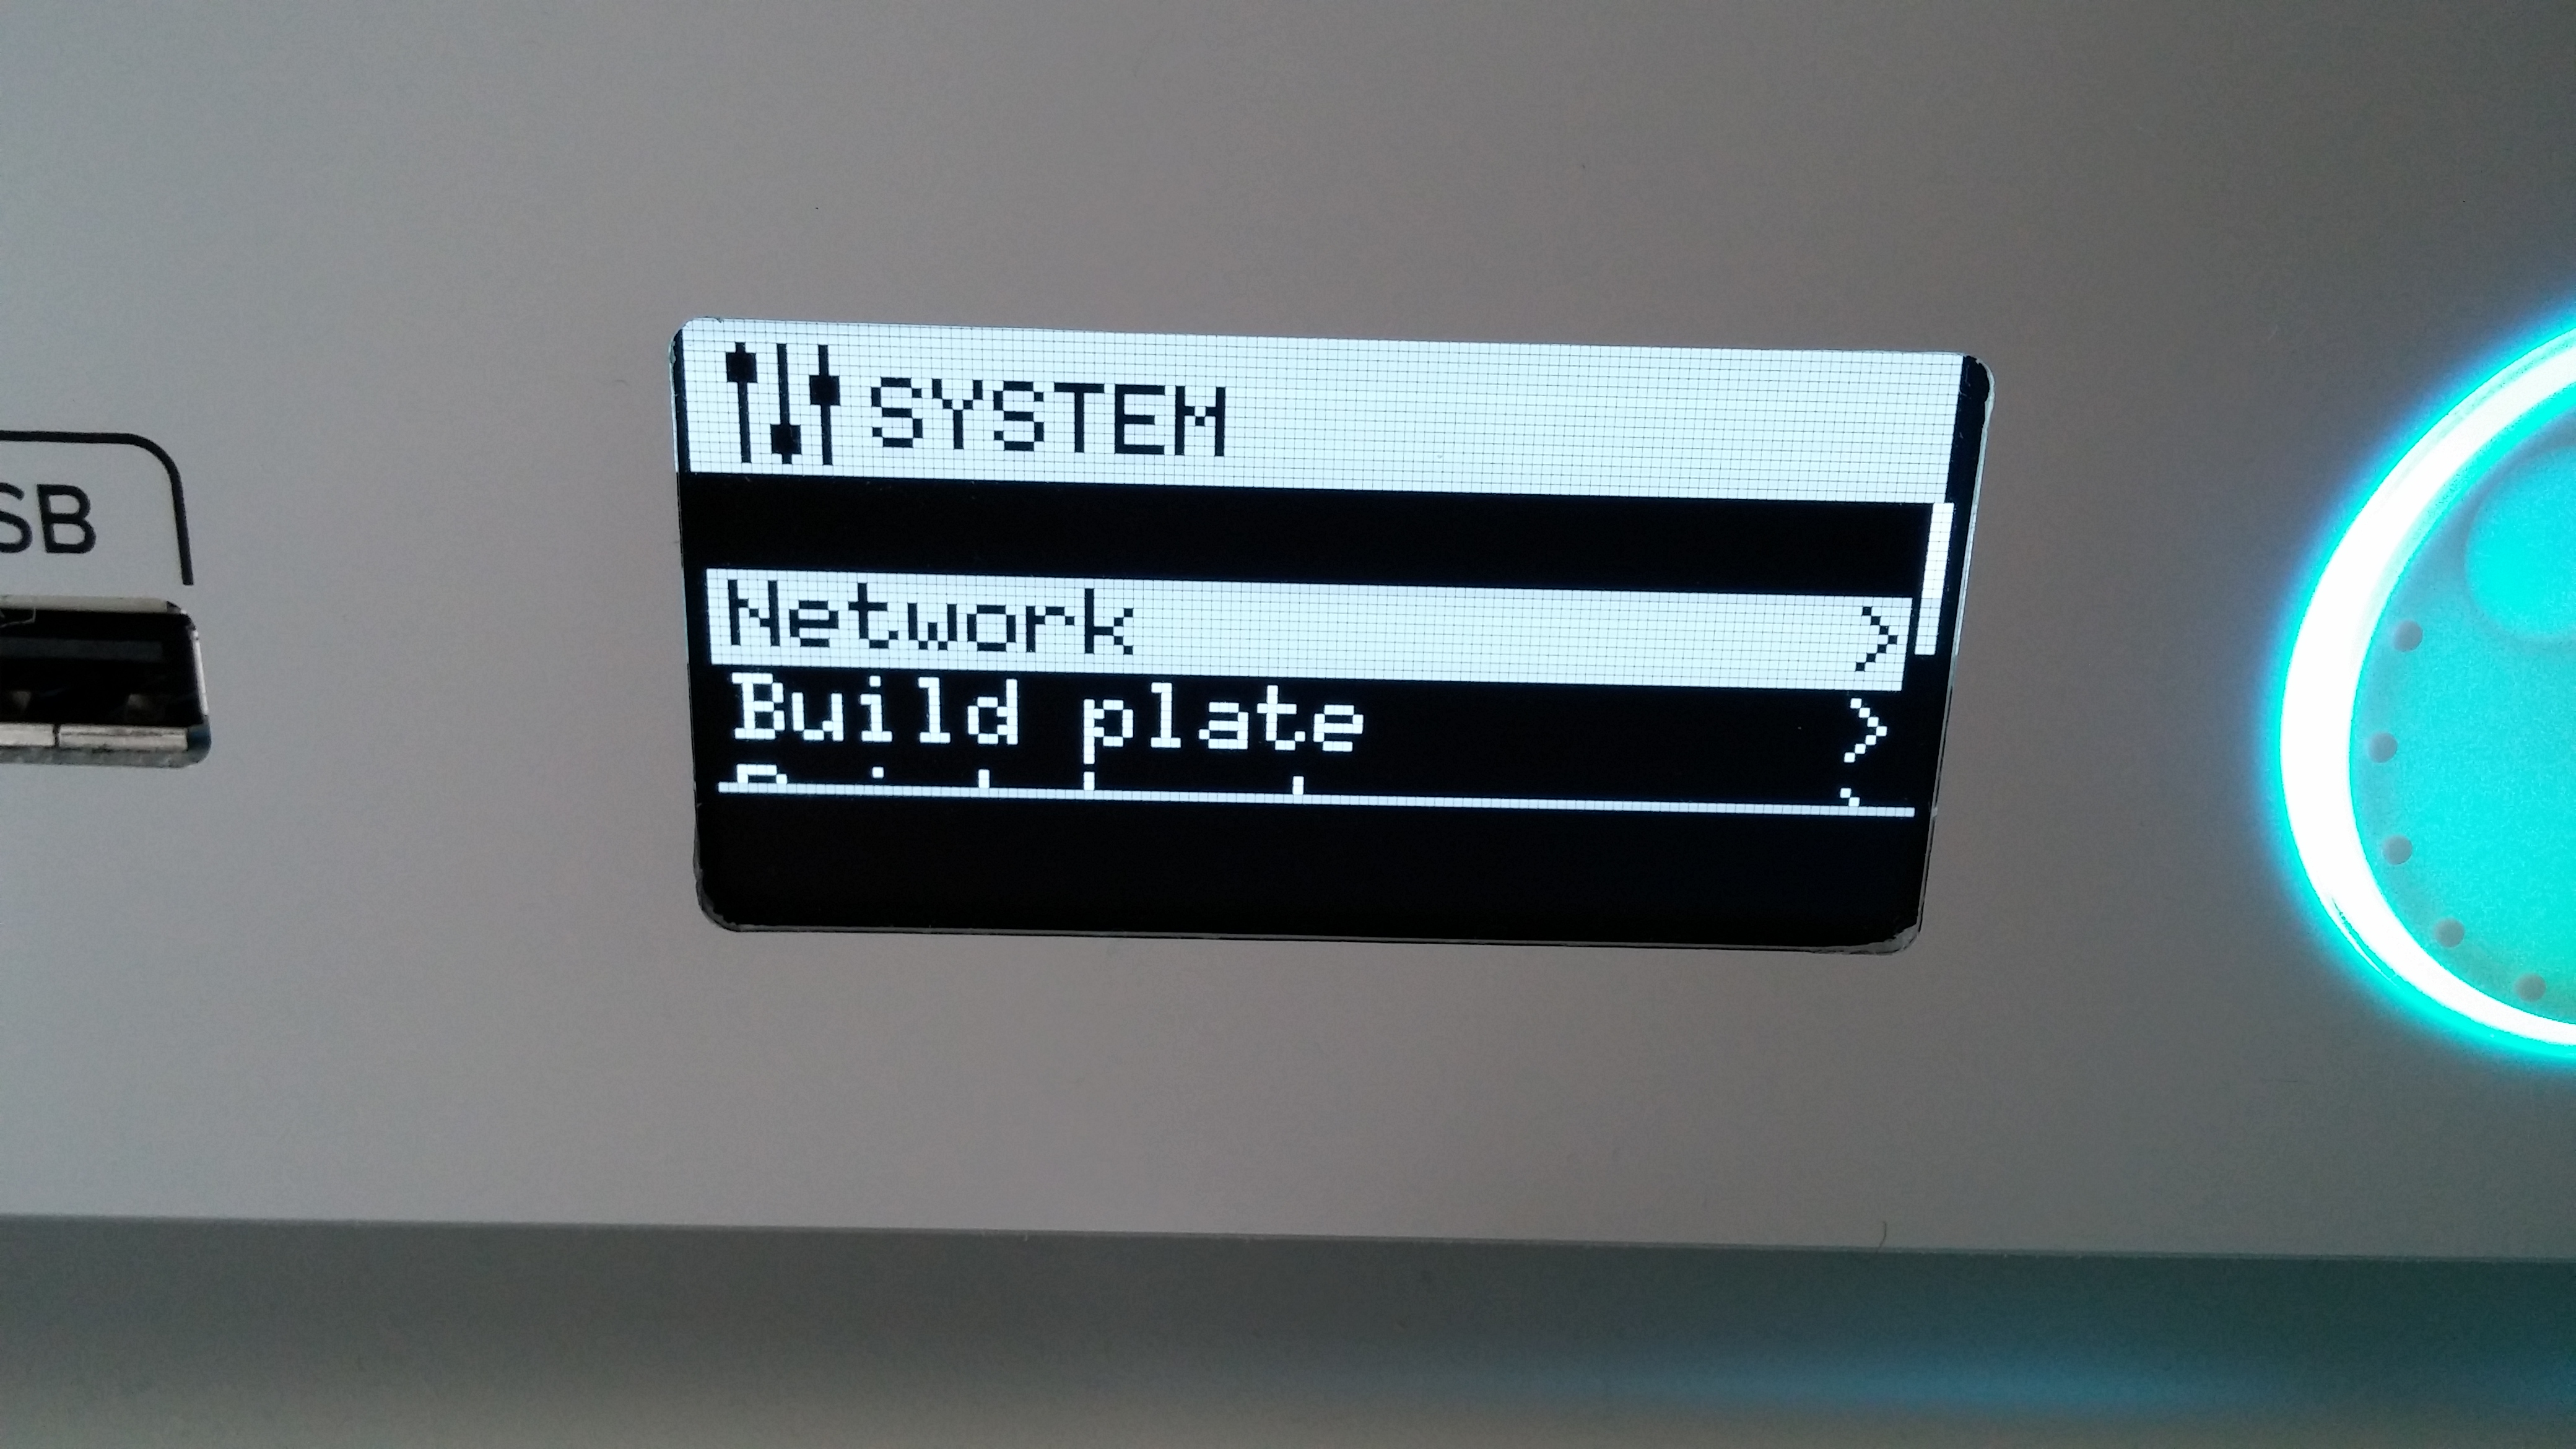 <figcaption class="wp-caption-text">Ultimaker 3 system menu with Network option selected.</figcaption></figure>
Finally select the “Connection Status” option and the IP address will show at the bottom of the screen.
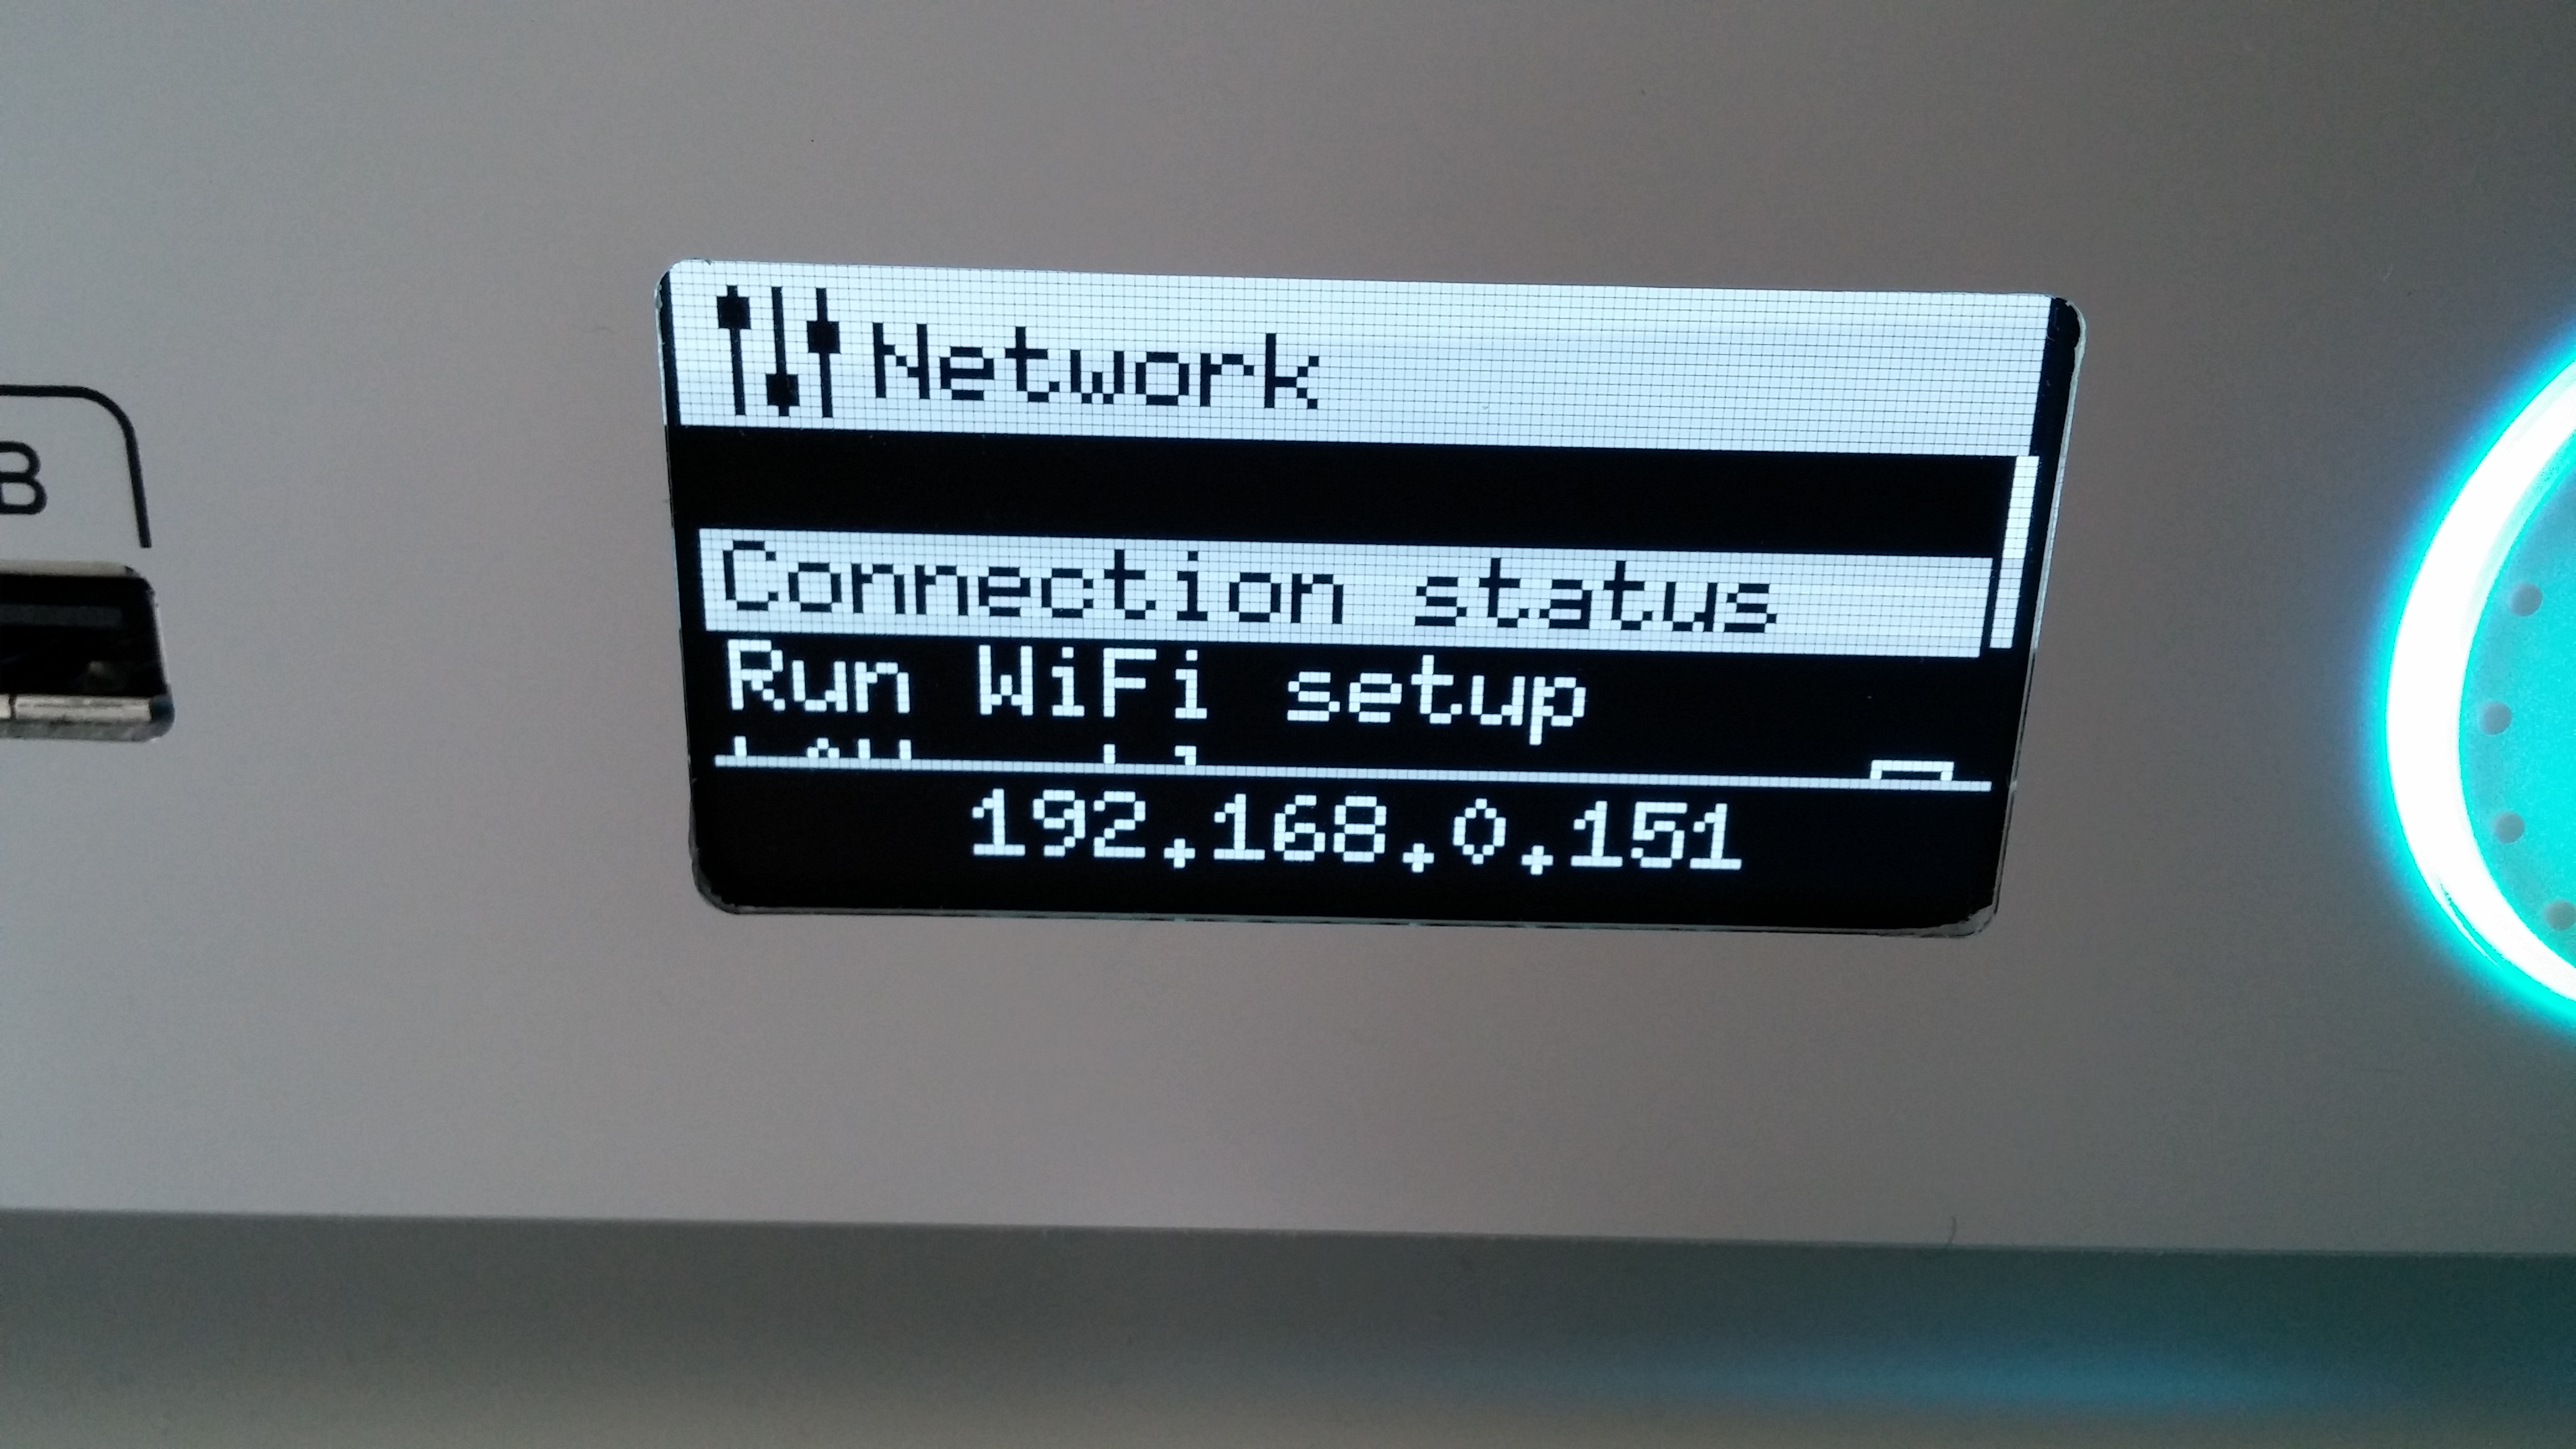 <figcaption class="wp-caption-text">Ultimaker 3 connection status, showing the IP address of the printer.</figcaption></figure>
Now you can construct the URL of the broadcast or stream. It looks like this:
http://<YOUR IP ADDRESS HERE>:8080/?action=stream
So in my case that would be http://192.168.0.151:8080/?action=stream. In your case, the IP address will be different, so the stream URL will also be slightly different.
You can open this URL in your browser to verify that it is correct. You should see the image of the webcam.
Recording the Broadcast
There are many ways to record the video stream of your webcam. They can be simple or they can be complicated.
If you are not very technical, I would suggest you get yourself VLC Media Player. It’s free and it works on almost any system.
Before you start, you will want to configure the folder where the recordings are stored:
- In the menu go to Tools > Preferences > Input/Codecs
- Enter your folder in Files > Record directory or filename
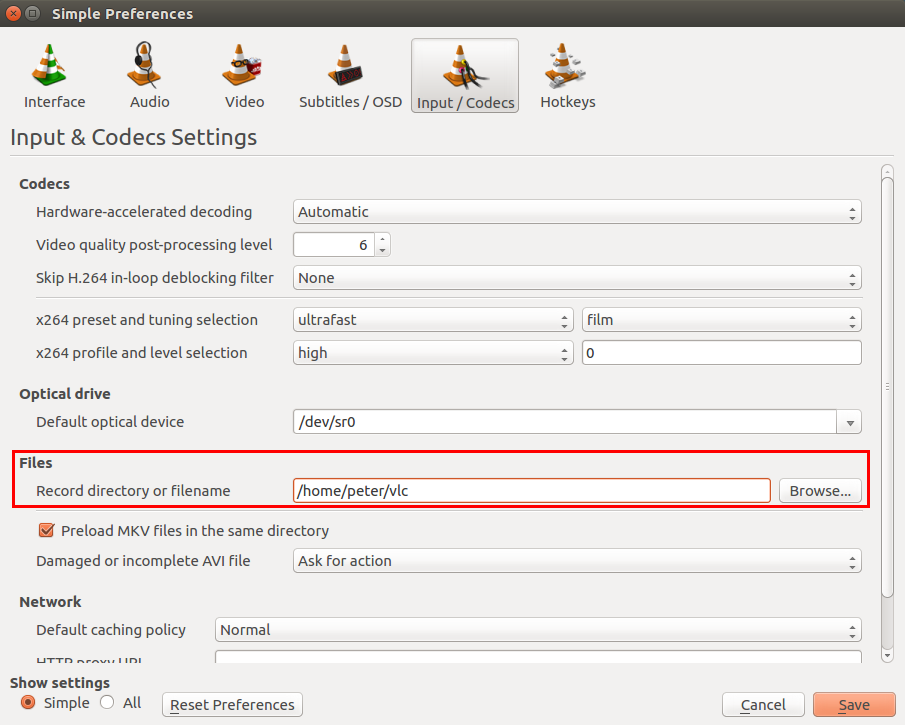 <figcaption class="wp-caption-text">Configure the folder where VLC will store recordings.</figcaption></figure>
To record your stream, first open it by going to the “Media” menu item and choose “Open Network Stream…”
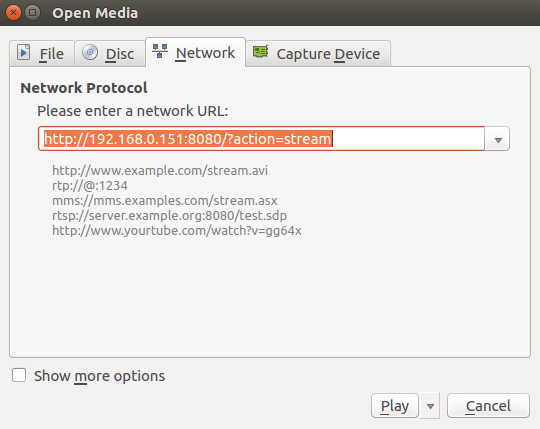 <figcaption class="wp-caption-text">Open a network stream in VLC</figcaption></figure>
Next, record the stream by picking the “Record” option from the “Playback” menu.
To stop the recording, click the record option again.
That’s all there is to it. You can now go into the folder you selected and rewatch the print.
Don’t forget to check out my other 3D printing articles, where you can learn to fix the most annoying problem with 3D prints: making them fit properly.