It’s been a while since I indulged in my Flash and 3D hobby. I’ve been a longtime Sandy 3D fan, but it was about time I tried the competition. This post gives a short overview of how to set up FlashDevelop to run your first Papervision3D application.
Before you get started, you’ll need a few essential tools:
- I’ll use TortoiseSVN (or any other SVN client) to get the latest version of Papervision3D. You can download a zip file of the current version, but setting this up once will make it a lot easier to follow all the latest development.
- I like FlashDevelop because it’s free and it has everything an IDE needs. I’m going to assume you’ve gone through the setup process and have configured FlashDevelop to use ActionScript 3 with the Flex SDK. This is also entirely free of charge and isn’t as much work as you might think.
Getting the Papervision3D code
Start of by creating a directory where you want to put the Papervision3D distribution. This won’t be your project directory because the distribution also contains the API documents and some examples.
In this directory right click and choose “SVN Checkout …” (adapt this to your system and SVN client) and enter the Papervision3D repository URL, which is http://papervision3d.googlecode.com/svn/trunk/as3/trunk/. Choose “Fully recursive” if it isn’t already selected and click ok.
After a while you’ll have the distribution on your PC. It’ll contain a few directories, most importantly “src” containing the actual Papervision3D library.
Setting up a Papervision3D project in FlashDevelop
No we’re ready to start a FD project. Open FlashDevelop and create a new AS3 Project. Put it in a different location than where you previously check out the Papervision3D distribution in order to avoid conflicts.
FlashDevelop will set up the project and create a “src” directory. It will also create an initial Main.as Flash application, but we’ll be replacing that in the next steps.
Copy the Papervision3D code into the src directory. Go into the src directory of the Papervision3D distribution and copy both directories (“nochump” and “org”) into the src directory of the FlashDevelop project.
Your workspace is ready.
Running the MeshCutting example
Papervision3D comes with a few examples, most of them require you to set up external resources, but not the MeshCutting example.
You’ll find it in the “examples/FlexSDK/MeshCutting” directory of the Papervision3D distribution.
Copy the files in the “examples/FlexSDK/MeshCutting/src” to your project’s “src” directory. Make sure you replace the Main.as.
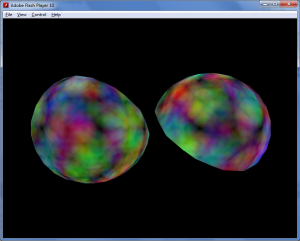
That should do it. Run the FlashDevelop project and you’ll be looking at this (animated):
And now the real work starts.
