Before I continue any Sandy3D or Flash tutorials, I’d like to go into another method of getting multimedia content in the browser: Java applets. One major advantage of applets is the possibility to use hardware acceleration inside the browser. This will tremendously increase the capabilities, quality and speed of the displayed pictures. None of the Flash 3D engines even come close.
As always, there is a drawback. Access to hardware requires more security privileges and is operating system dependant. Java solves a little, but at some point you need to go to the hardware. Enter Lightweight Gaming Library (LWJGL). It allows crossplatform access to the OpenGL library. Combine this with some of the Java security features and you’ve got a winner.
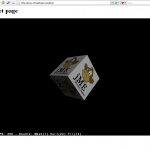
If you click on the image above, a new window should open that loads the applet. After everything’s done loading, you should get a security warning. I haven’t paid for a certificate, so you will have to trust me that the applet won’t mess with your system. Let me know if you see any errors. If you get a red cross, right click and open the Java console. I’m very interested in seeing how well everything performs across different browsers and OS’s.
OpenGL is still pretty lowlevel so to make things a little easier, I’ve added jMonkeyEngine into the mix. At the core jME is a scenegraph based 3D engine, but it adds many more libraries that are useful for 3D and game development, such as the physics library.
jME already has a nice tutorial on the WIKI, however there are a few things mising. If you want to get the tutorial running, you can just follow along with the example right until you’ve build the example and packaged it into a jar file (using a IDE like NetBeans or Eclipse will make this very easy). Now lets assume you have the jar file with your applet class. Copy it into your ‘release’ directory. This is the directory you will upload to your site. To get it running, you need a few libraries (most of these you probably already have downloaded during the development of the applet):
- LWJGL applet libraries: From that link, download from release 1.1.4, the file lwjgl_applet-1.1.4.zip. Unzip it and copy lwjgl.jar, lwjg_applet_util.jar and natives.jar into your release directory.
- JME libraries: Download and unzip version 1.0 and copy jme.jar and jme-awt.jar in the directory.
- JME test libraries (give you easy access to a few images and objects): Again get version 1.0 and copy jmetest.jar and jmetest-data-images.jar into the directory.
Because jME needs to access the texture file, the applet needs to be signed. LWJGL is alrady signed, so no problem, however, the jar file you created yourself also needs to be signed. Open a command prompt window:
- If you don’t have a certificate, create one: keytool -genkey -alias key_name
- Change to the path where the jar file is located
- Sign the file: jarsigner my_jar.jar key_name
Now you can go ahead and create the index.html. You can take the one from the tutorial, however, you need to add a few libraries to the “archives” parameter. Make sure all jar files mentioned above are referenced:
archive=”lwjgl_util_applet.jar,lwjgl.jar,natives.jar,jme.jar,jme-awt.jar,jmetest.jar,jmetest-data-images.jar,my_jar.jar”
And that should do it. Load the index page in your browser to see the result. Here’s a screenshot of what you should see:
